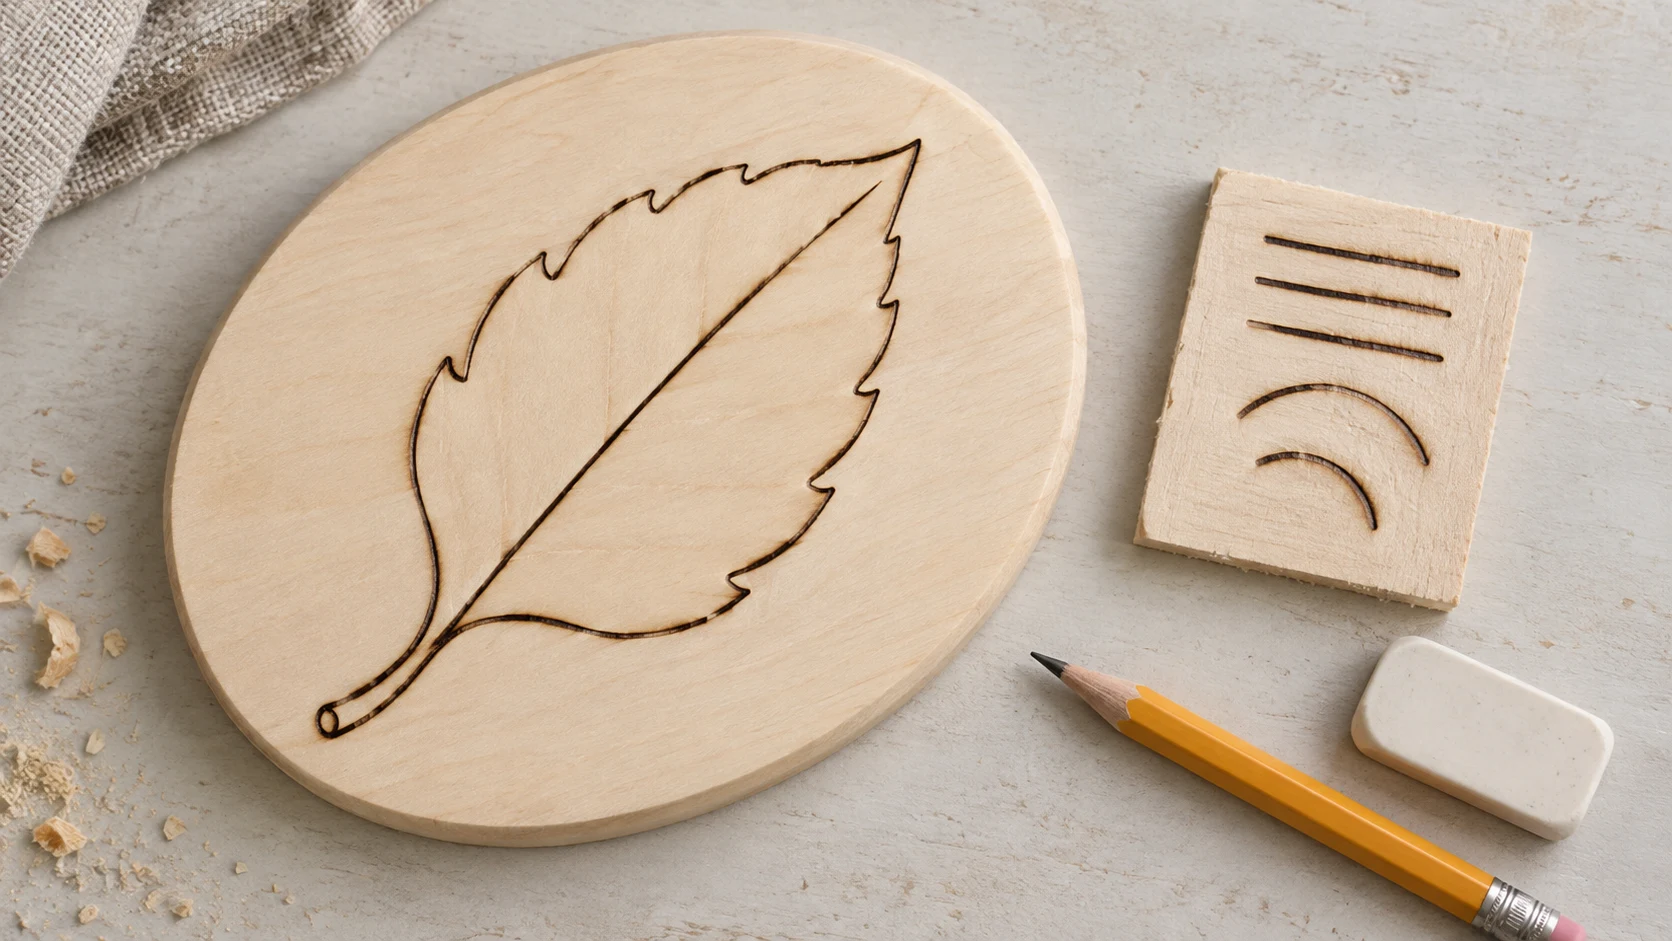
Wood burning, also called pyrography, uses a heated metal tip to make marks on wood. For your first project, aim for one simple leaf outline on a smooth blank. A few clean curves will teach you more about the tool than trying to fill a large picture immediately.
This guide takes you from choosing supplies to cooling and finishing the piece. Practice the marks on scrap first, keep the design simple and use your burner’s instructions alongside these steps.
Print the leaf template and project checklist
A simple outline is enough for your first piece. This free two-page pack gives you a 3-inch leaf to trace and a checklist to keep beside your workspace. Choose US Letter or A4.
Download US Letter PDF Download A4 PDF
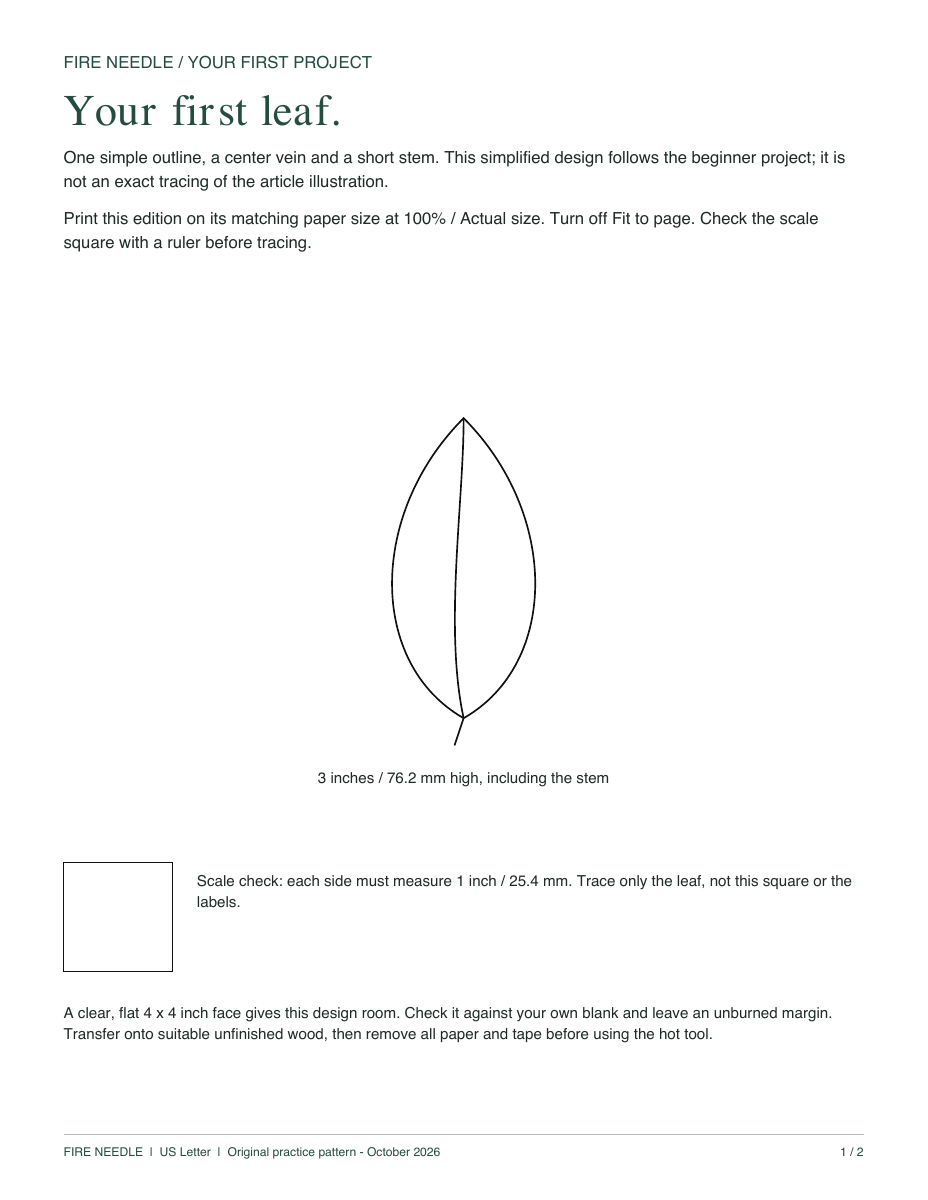
Print the PDF at 100% / Actual size and check the 1-inch square with a ruler. Transfer the outline, then remove the paper and tape before burning.
Choose a burner and a suitable blank
A solid-point pen or a wire-nib system can work for a first project. Choose equipment intended for pyrography, with a secure holder, clear instructions and the correct voltage for your location. Adjustable heat is useful, but a larger tip collection is not essential.
The wood-burning kit comparison explains the options. If you already own a suitable pen, learn its controls before buying another one.
For a dedicated wire-nib setup, the YIHUA 939-II is the single-pen option in our comparison. If you want to try both solid-point and wire-nib tools, compare it with the WEP 939D-II. Choose one setup; you do not need both to make this leaf.
- Wood: a known, untreated and unfinished solid-wood blank. Pale, fine-textured basswood is a practical starting choice. Compare surfaces in our wood-selection guide.
- Practice material: an offcut of the same wood, prepared like the project surface.
- Drawing supplies: a pencil, eraser, plain paper and low-tack tape.
- Preparation supplies: suitable sandpaper and a way to remove sanding dust before burning.
- A holder: the secure holder supplied or recommended for your pen, on a stable work surface.
For a larger display version of this project, the Make Market 11-by-14-inch basswood oval offers a lightly sanded, kiln-dried surface. Your first leaf does not require an 11-by-14-inch plaque; a smaller suitable blank is enough. Check the actual wood before use, since a craft label alone does not establish its treatment.
Set up before switching on
Keep the work area stable, well lit and clear of paper, solvents and other items that could touch the hot tip. Position the cord so it cannot pull the pen or holder off the table. Keep children and pets outside the hot-tool area.
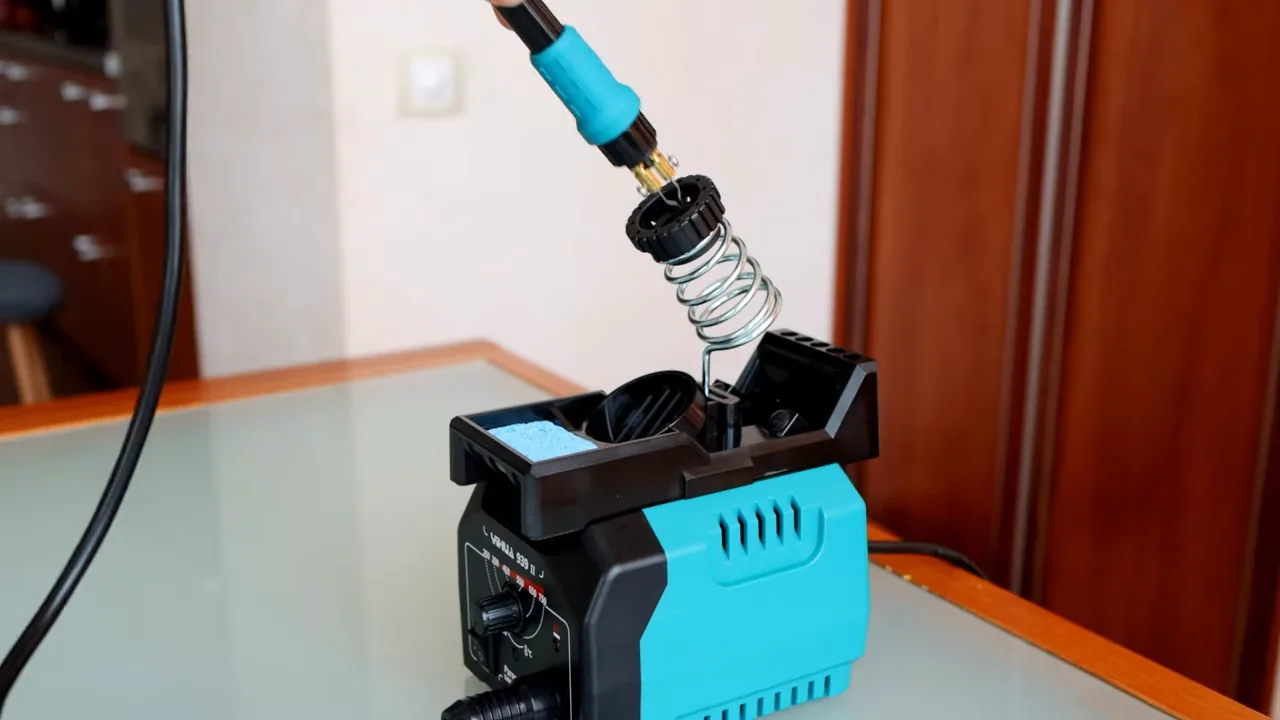
- Use the holder every time you pause. A heat-resistant tile may protect a surface, but it does not secure a loose pen.
- Plan ventilation. Keep your face out of the smoke path and arrange appropriate extraction or ventilation. A desk fan that merely moves smoke around the room is not a complete solution.
- Check the wood. Do not burn paint, stain, varnish, treated wood or an unknown reclaimed surface. Avoid plywood and other glued composites for this first project.
- Read the tool’s setup instructions. Fit a compatible tip while the equipment is off, unplugged and fully cool. Follow the specified warm-up process.
Read the full safety guide before starting, and use the material checklist if you are unsure about a blank. The tip and nearby metal can remain hot after the power is off.
Prepare the surface and draw a leaf
Inspect the blank for rough fibers, deep scratches and cracks. Smooth rough areas before drawing, using an appropriate sanding sequence for the surface. Remove the dust, then look across the wood in side light for remaining scratches.
Draw a large, simple leaf on paper with one center vein and a short stem. Leave out tiny veins and elaborate shading. A smooth outline is fine; you do not need every notch shown in a reference.
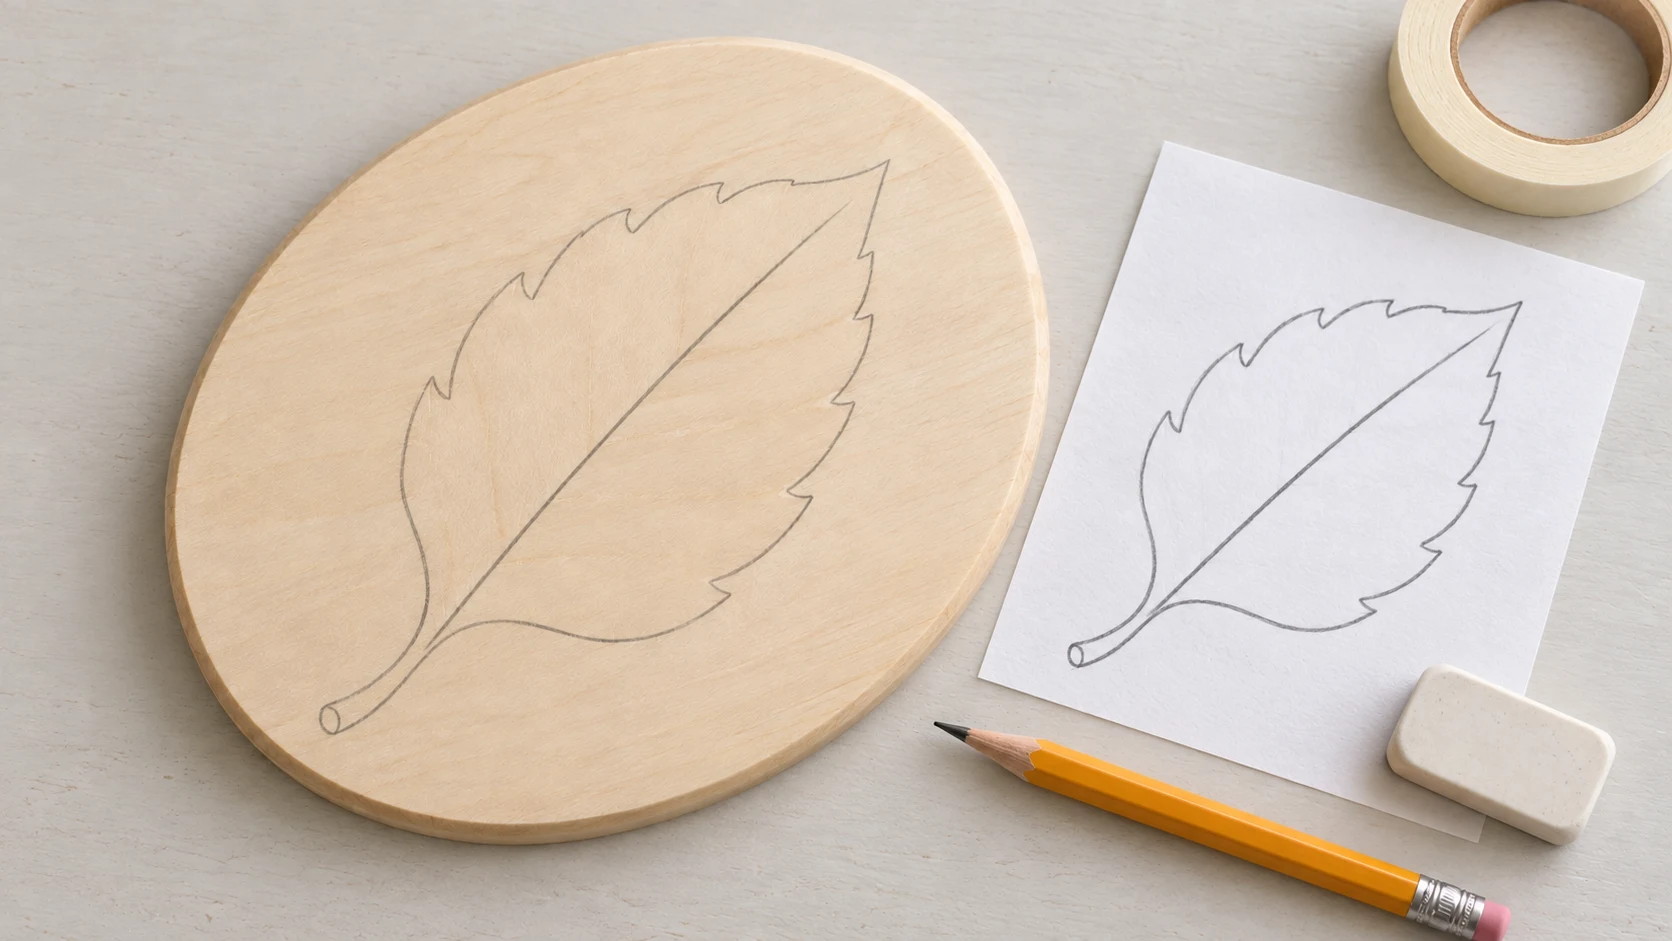
- Check the size. Keep the design inside the flat face, leaving a margin around it.
- Draw lightly or transfer. Sketch onto the wood, or use optional PSLER graphite transfer paper beneath the paper pattern, marking side toward the wood.
- Trace with light pressure. Lift a corner to check the transferred guide before removing the pattern.
- Clear the work area. Remove all paper and tape before bringing the hot tip to the blank.
The transfer guide covers alternatives if you prefer to use supplies you already have.
Before you burn: the leaf fits inside the clear face of the blank, its pencil lines are light enough to follow, and all paper and tape have been removed. Use the printable template if drawing the outline is holding you up.
Practice three marks on matching scrap
For printed line, curve and shading guides, use our free pyrography practice sheets. Transfer the guides onto your practice wood and remove the paper before burning.
Start with the settings and warm-up process in your manual. There is no single temperature that suits every pen, tip and piece of wood. Find a light brown mark you can make with gentle contact and comfortable movement.
- A short straight line. Touch down as you start moving. Lift before stopping so the end does not turn into a dark dot.
- A gentle curve. Work in short sections. Put the pen in its holder before turning the wood to a better angle.
- A light shaded patch. Try several close, overlapping strokes without pressing down. Keep it small enough to compare with untouched wood.
If a line is too pale or dark, change one thing at a time on scrap: your pace, contact or heat. Do not force the tip into the wood. The heat guide helps with this adjustment.
Ready for the leaf? You can make a short line and gentle curve without forcing the tip into the wood, and you can lift without leaving a large dark stop mark. Aim for a visible, controlled line, not perfect uniformity. Repeat the scrap exercise if the marks are still difficult to control.
Burn the leaf in short sections
Choose the easiest part of the outline to begin. Keep your grip comfortable and your fingers on the intended handle area, clear of the hot metal.
- Follow a short edge. Make a light first line instead of trying to reach a dark outline in one slow pass.
- Lift at awkward corners. Reposition rather than leaving the hot tip resting while you work out the next movement.
- Complete the outer shape. Turn the plaque as needed with the pen safely in its holder.
- Add the center vein and stem. Use the same controlled strokes you practiced on scrap.
- Step back. A simple outline is a finished design. Add a little shading only if you want to practice that extra step.
For optional shading, keep one side pale and add a few light strokes on the other. Use the shading guide for more practice. Do not cover the whole leaf in dark marks to hide a small wobble.
Your first finish line: the outer shape reads as a leaf and the vein and stem are clear. A slightly uneven outline is still a completed first project. Leave it there if you are happy with it; extra shading is optional.
Pause when the marks stop behaving
A dragging tip or patchy line is a reason to check the cause, not automatically turn up the heat. Rough grain, changing contact, residue and tool problems can produce similar symptoms.
- Dark blobs: check whether you pause with the tip touching the wood.
- Wide or scorched lines: test a lower heat or shorter contact on scrap.
- Skipping: inspect the surface and, after cooling, the tip’s working edge.
- Erratic heating or damaged parts: stop using the equipment and follow the manufacturer’s troubleshooting or service instructions.
The troubleshooting guide gives a fuller sequence. Tip cleaning is model-specific: do not assume sandpaper, a sponge or a wire brush suits every nib. See the tip-care guide before choosing a method.
Cool, inspect and finish
Switch off and unplug when finished. Leave the pen secure in its holder until fully cool before handling the metal, changing tips or packing it away. Follow the tool’s cooling instructions rather than relying on a fixed number of minutes.
- Inspect the cooled plaque. Remove remaining pencil gently without rubbing away the burned detail.
- Decide whether to apply a finish. A dry indoor practice plaque can remain unfinished. A finish changes its appearance and may offer protection appropriate to its intended use.
- Test first. Try your chosen finish on scrap, then follow its application, ventilation and curing directions.
- Keep heat away from coatings. Complete every burn before adding paint, oil or another finish. Do not burn through a finished surface to make corrections.
The finishing guide explains the options. Allow the specified cure time before wrapping a gift or putting the surface into use.
Choose one skill for the next piece
Keep your scrap and finished leaf so you can compare the marks. Note the tip, wood and movement that felt easiest. Your next project can repeat the same idea with steadier lines or add just one new challenge.
Try a single initial, a small star ornament or a coaster pair from the project chooser. For a structured routine, use the seven-day practice plan at a pace that suits you. There is no deadline for progressing to detailed artwork.
Your next two projects
Next: make a coaster set. Repeat a simple design across four blanks and practice keeping the lines consistent. Follow the coaster project.
Then: make a personalized ornament. Fit an initial or small motif around a hanging hole and turn your practice into a gift. Make a wood-slice ornament.
Still working on steady lines? Use the practice sheets before starting the next piece.
Still unsure what equipment or experience you need? Our beginner wood-burning FAQ answers common starting questions.