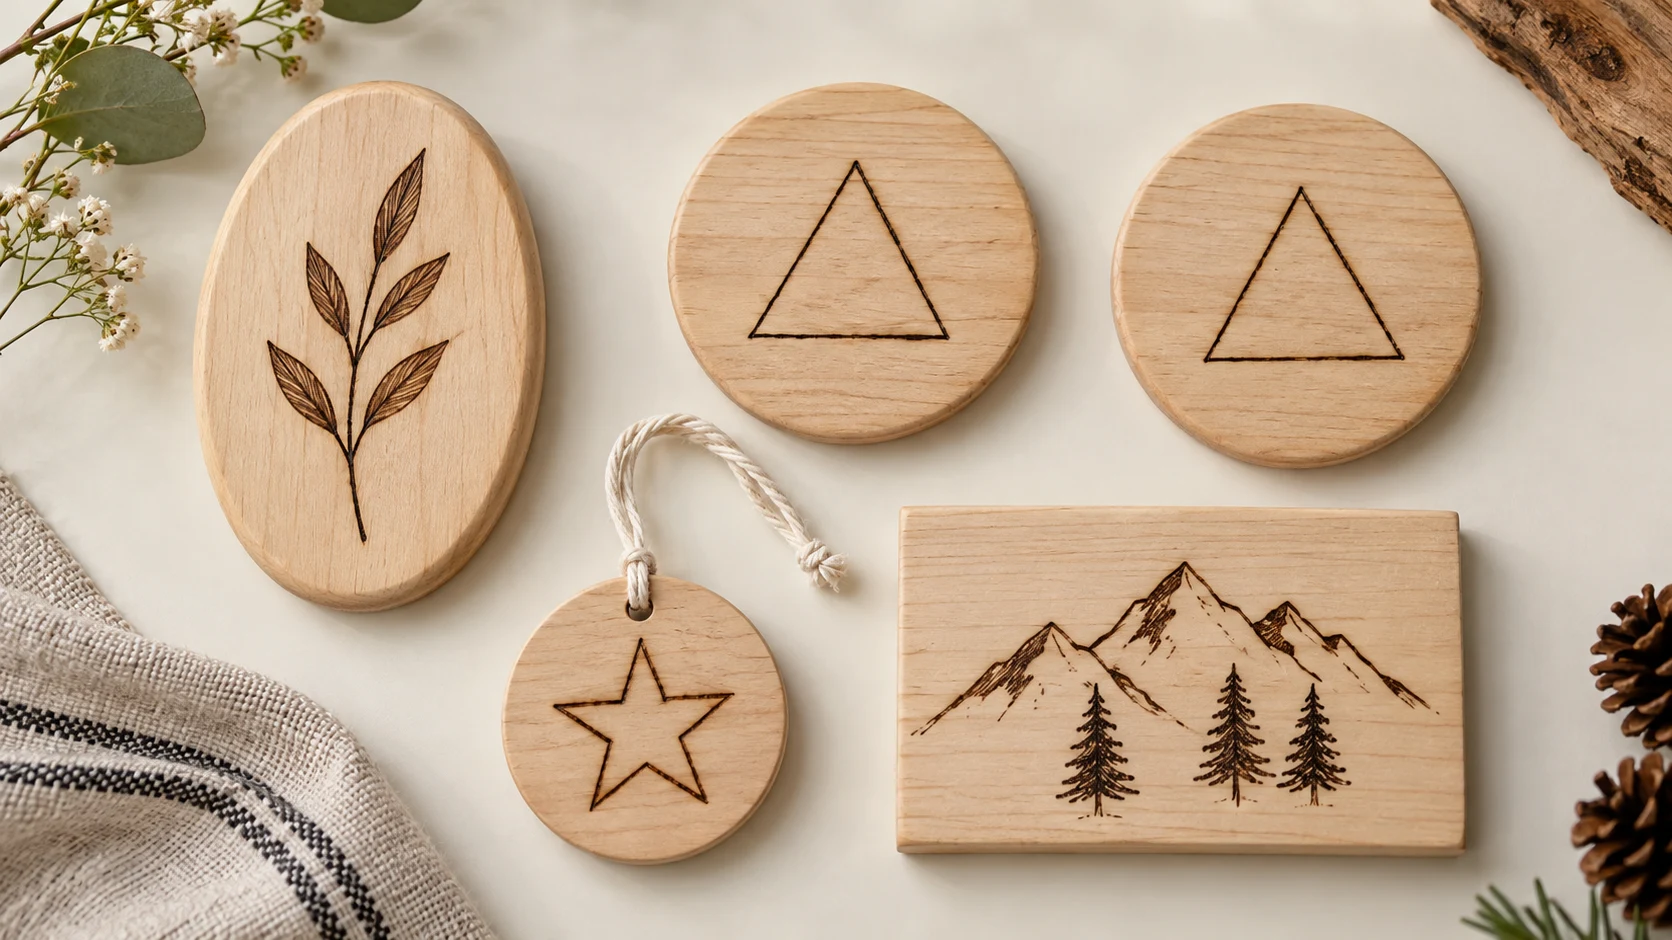
Choose a wood-burning project with one main challenge: a few clean lines, a short initial, a repeated pattern or a small area of shading. You can make something useful while practicing, without beginning with a detailed portrait or a board full of tiny lettering.
Here are ten ideas, grouped by what you want to make. Start with the simpler version, then add detail on your next piece. There is no fixed number of weeks before you are ready to try something new.
Choose your next project
| Project | Main practice | Keep it manageable |
|---|---|---|
| Leaf plaque or initial | Curves and line control | One motif, generous empty space |
| Coaster pair | Repeating a design | Two pieces before a full set |
| Ornament or gift tag | Placing a small design | One star or initial, away from the hanging hole |
| Rosette or geometric tile | Spacing and symmetry | A few large shapes, mostly outlines |
| Welcome sign or keepsake | Lettering layout | Short wording checked on paper first |
| Landscape or animal outline | Tone and silhouette | A small composition with limited detail |
If you have never used a burner, read the complete beginner guide first. Choose the design you can comfortably sketch and practice its hardest stroke on scrap before transferring it.
Gather supplies for the project you chose
Use a burner with its proper holder, known untreated and unfinished wood, a pencil and matching scrap. Prepare a stable work area with appropriate ventilation as explained in the safety guide. Keep paper patterns clear of the hot tool.
For a larger display project, the Make Market 11-by-14-inch basswood oval gives a leaf motif, initial or keepsake design room to spread out. It is lightly sanded and kiln-dried. Plan within the usable face; smaller suitable blanks remain a good choice for quick first projects.
Optional PSLER graphite transfer paper helps place a paper design on the wood. Remove all paper and tape before burning. Our design-transfer guide covers the method.
Choose a blank that fits the finished object. A thin decorative cutout is not automatically a suitable coaster, and an unspecified craft board is not automatically suitable for serving food. Check the material and intended use before buying.
First projects: a leaf, an initial or two coasters
1. A simple leaf-sprig plaque
Practice: gentle curves and lifting the tip cleanly. Draw one stem and a few large leaves, leaving space between them. Burn the outline first and stop there if you like the result. Add a center vein or a little shading only after testing it on scrap.
Make it easier: use three leaves instead of a detailed fern. Keep the motif away from cracks, knots and the outer edge.
2. A single-initial plaque
Practice: straight strokes, corners and spacing. Draw one clear block letter at actual size on paper, then transfer a light outline. Outline it in short controlled strokes, turning the wood with the pen in its holder when needed. An outline letter can remain unfilled.
Next step: add a short name using the lettering guide. Longer wording needs more planning, not simply smaller letters.
3. A matching coaster pair
Practice: repeating the same motif at the same size. Try a triangle outline, small leaf or simple mountain shape on two flat blanks. Keep the design shallow and leave a comfortable margin.
Before using them: complete the preparation and finishing stages in the coaster tutorial. A finished design still needs a surface and finish suited to its intended use.
Small gifts: ornaments and reusable tags
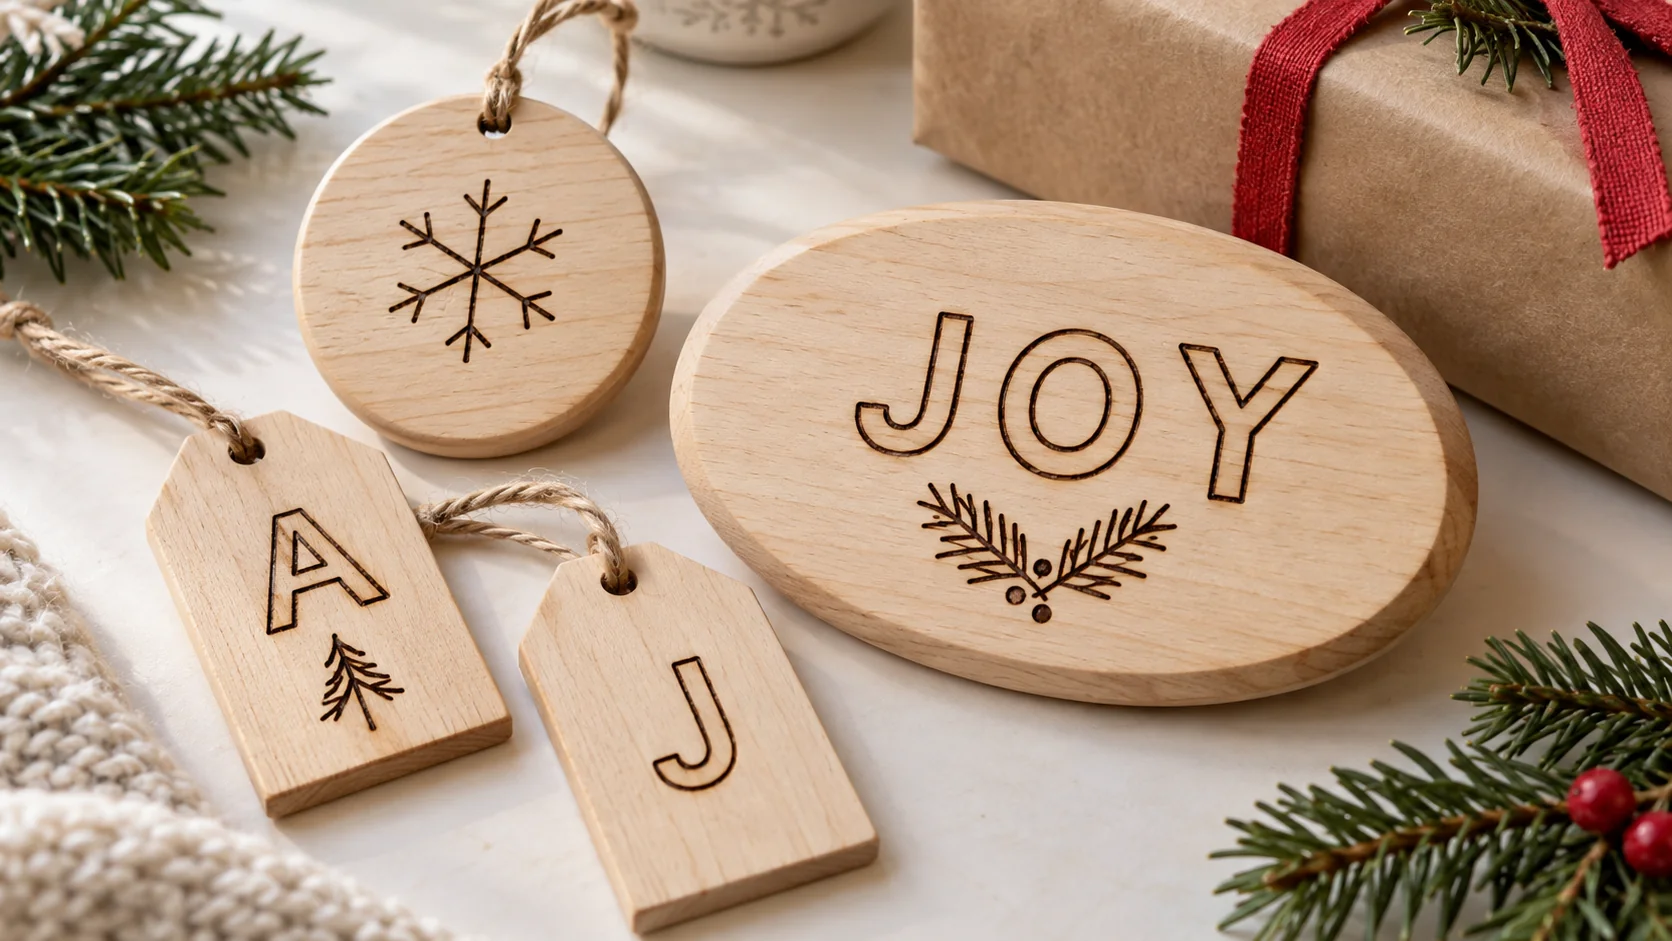
Small blanks suit simple marks. Plan around the hanging hole before drawing, and save cords, ribbon and wrapping for the cooled, completed piece.
4. A star or snowflake ornament
Practice: joining short lines without dark blobs at the corners. Start with a star outline or a simple six-arm snowflake. Lift before pausing at an intersection rather than leaving the tip resting there.
Make it easier: skip miniature branches and shaded backgrounds. Follow the holiday-project guide for a complete ornament and tag sequence.
5. A reusable initial gift tag
Practice: fitting a design into a small usable area. Put one initial and a small symbol on the face, with enough space for the cord. Keep a longer message on a separate paper gift card.
Before making a batch: finish one sample and check that its letter is readable and its edges are smooth. A small tag can be more fiddly than a larger plaque, so do not choose it only because it looks quick.
Patterns and lettering: add one new challenge
6. A simple rosette or geometric tile
Practice: repeated curves and even spacing. Begin with a center circle and a few large petals, or a small grid of triangles. Draw the whole layout lightly before burning any part.
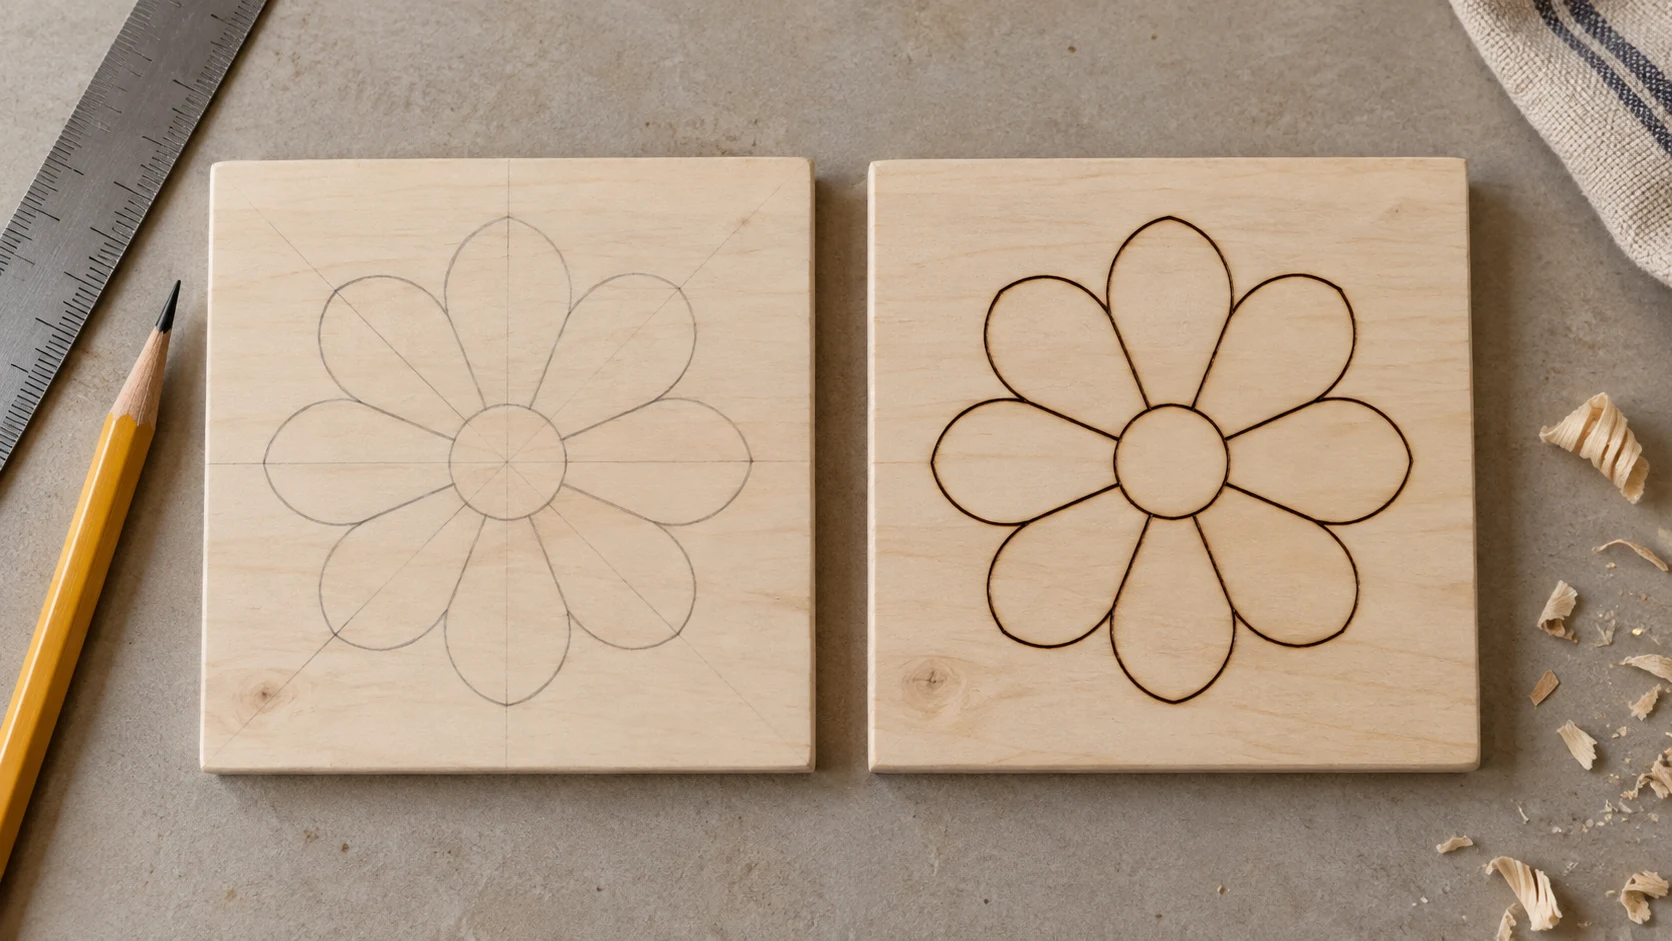
Complete the outlines before deciding whether to add tone. Leave some shapes unburned to keep the pattern open. Use the mandala guide when you want more detailed help with radial layouts.
7. A short welcome sign
Practice: arranging a word across a larger face. Make a full-size paper layout and check the space at both ends before transferring. Keep the lettering clear of irregular edges and simplify any decorative border.
Try the welcome-sign tutorial. Decide where the sign will be displayed before choosing the blank, finish and hanging hardware.
8. A wedding or anniversary keepsake
Practice: balancing two initials or short names with a small motif. Confirm spelling and dates, then keep the lettering as the focal point. One sprig is enough decoration for a first attempt.
The wedding-keepsake guide takes the project through layout, burning and wrapping. Allow time for practice and any finish curing before promising it for an event.
Try a small scene before a detailed portrait
9. A mountain and tree scene
Practice: separating foreground and background. Sketch one mountain outline and a few trees, keeping most of the wood pale. Add a little tone to one mountain face before attempting a full sky, water reflections or dozens of branches.
Next step: use two or three distinct tones from the shading guide. Keep a spare sample beside the project to compare the marks.
10. A simple animal outline
Practice: recognizable curves and proportions. Choose a clear side-view bird, fish or other uncomplicated shape from your own drawing or a reference you can use. Leave it as an outline first. A large dark fill adds more work and is not essential.
Next step: add a small area of feather or fur texture on scrap before bringing it into the design. Detailed portraits can wait until you want that challenge; there is no timetable you must follow.
Finish one piece, then choose the next
- Check the cooled work. Look at the overall design before trying to correct every small variation. Use the troubleshooting guide if a repeated problem is getting in the way.
- Complete all burning before finishing. Choose the finish for the object and its intended use, following its application and curing directions.
- Keep one useful note. Record the wood, tip and stroke that worked well. A photo of the finished piece makes progress easier to see.
- Change one challenge next time. Try a slightly longer word, another repeated shape or one shaded area rather than increasing every part of the difficulty at once.
Need a starting outline? Browse the free pyrography patterns. Choose the design you want to return to, not the most complicated one on the page.