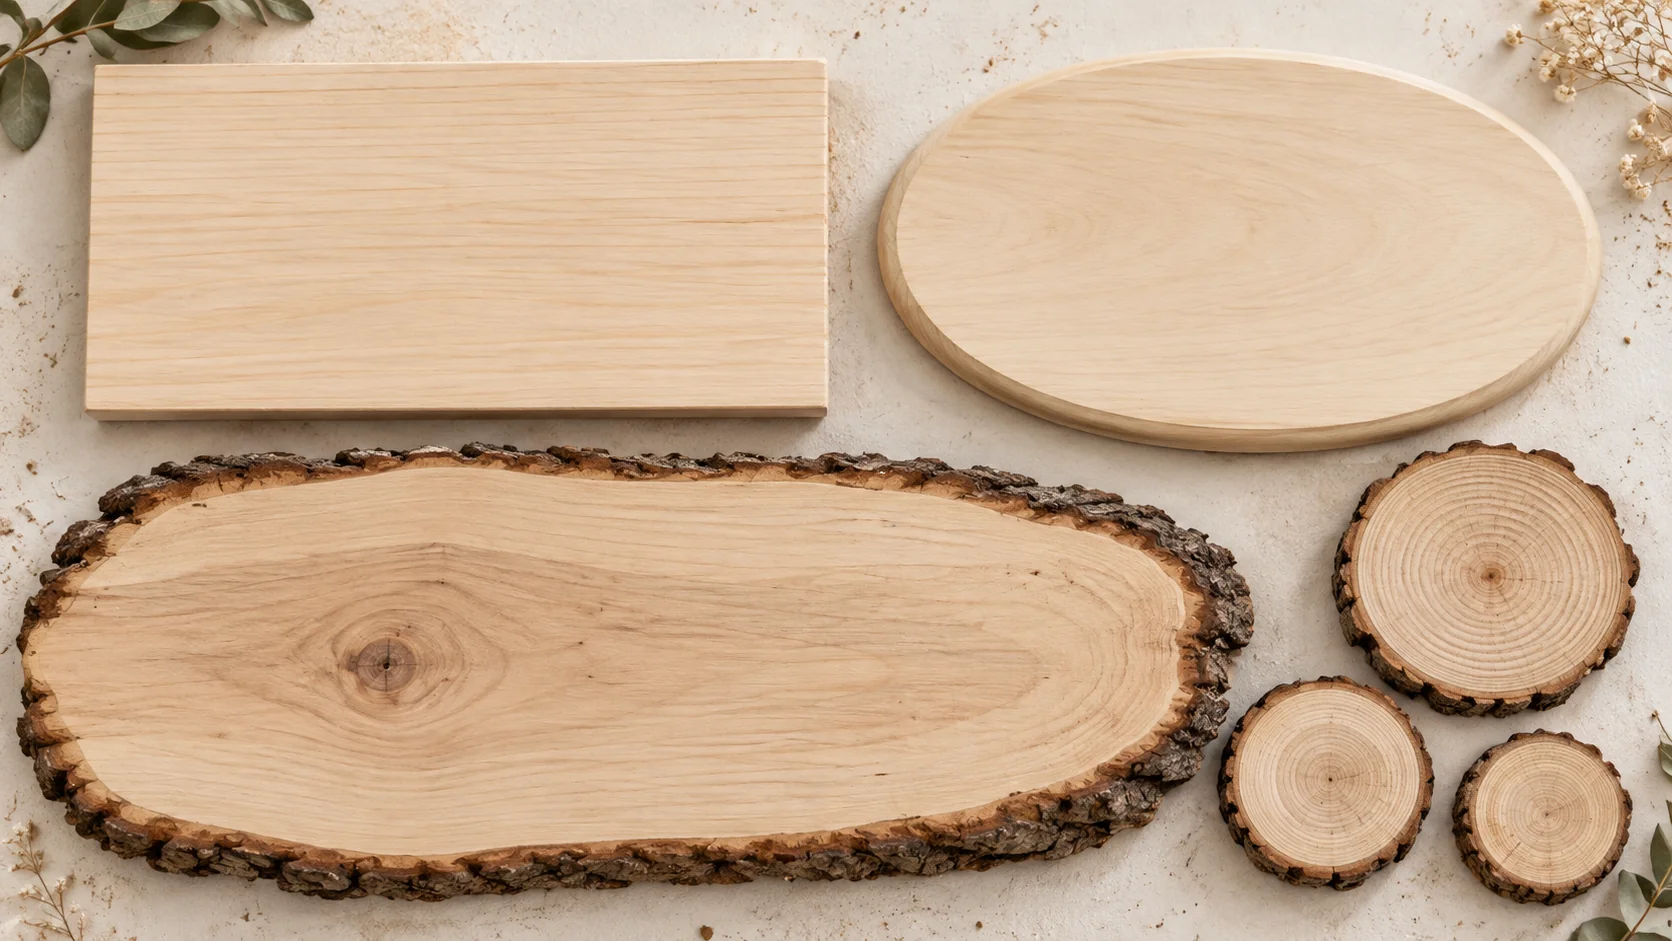
For your first pyrography project, choose a smooth, pale, unfinished basswood blank with enough clear space for the design. Then choose the shape: a flat board for practice, a shaped plaque for a small gift, or a bark-edge plank for a sign.
A listing that says “wood for crafts” does not tell you everything you need. Check the species, construction, surface treatment and usable dimensions before buying. A bargain pack is only useful if its pieces suit the work you want to make.
Start with the wood, then choose the shape
Basswood has a light color and fine texture that make it a useful starting point for outlines and shading. It still has grain, and individual pieces can have knots, streaks or dents. Look at the actual surface instead of expecting every blank to resemble the listing photo.
- For practice: choose a flat, comfortably sized board with clear grain and room for repeated marks. Keep an offcut of the same wood for testing.
- For a small finished gift: a beveled plaque gives a simple outline around the artwork without adding a separate frame.
- For a sign: a larger bark-edge plank leaves room for lettering and a border. Plan around its irregular sides.
- For ornaments: small rounds fit short names or simple motifs, but check the species and clear drawing area before buying a large pack.
Do not assume a thin sheet advertised as basswood is a single piece of timber. Read whether it is solid wood, veneer or plywood. For this beginner guide, choose known, unfinished solid wood and keep burning away from adhesive joints. Our wood-species guide explains the broader options.
Compare two basswood options by project
These picks serve different purposes. The small oval suits a compact indoor picture or name plaque. The larger four-pack makes more sense when you already have several signs planned. Neither is a reason to buy more wood than you will use.
| Product | Size and quantity | Surface | Choose it for |
|---|---|---|---|
 Make Market basswood oval |
11 × 14-inch shaped plaque | Lightly sanded, kiln-dried basswood oval | Larger indoor pictures and name plaques |
 Foggy Bottom premium basswood planks |
Four planks, 11–14 × 16 × 0.69 inches each | Kiln-dried, sanded basswood with natural bark edges | Larger lettering projects and multiple signs |
The Make Market 11-by-14-inch basswood oval gives you room for lettering, a botanical design or a larger practice sampler. Its surface is lightly sanded and the wood is kiln-dried. Measure the usable face before sizing your pattern. A smaller suitable basswood blank is enough for a compact plaque; there is no need to enlarge the project to match this listing.
The Foggy Bottom premium basswood planks come as four kiln-dried, sanded pieces. The listing gives a variable width of 11–14 inches, a 16-inch length and 0.69-inch thickness. Natural bark, grain and imperfections vary from piece to piece. Buy for the usable face, not the widest point of the bark.
Inspect the blank before planning the artwork
Unpack the wood before finalizing a pattern. Check both faces and every edge in good light, then set each piece on a flat surface to see whether it rocks.
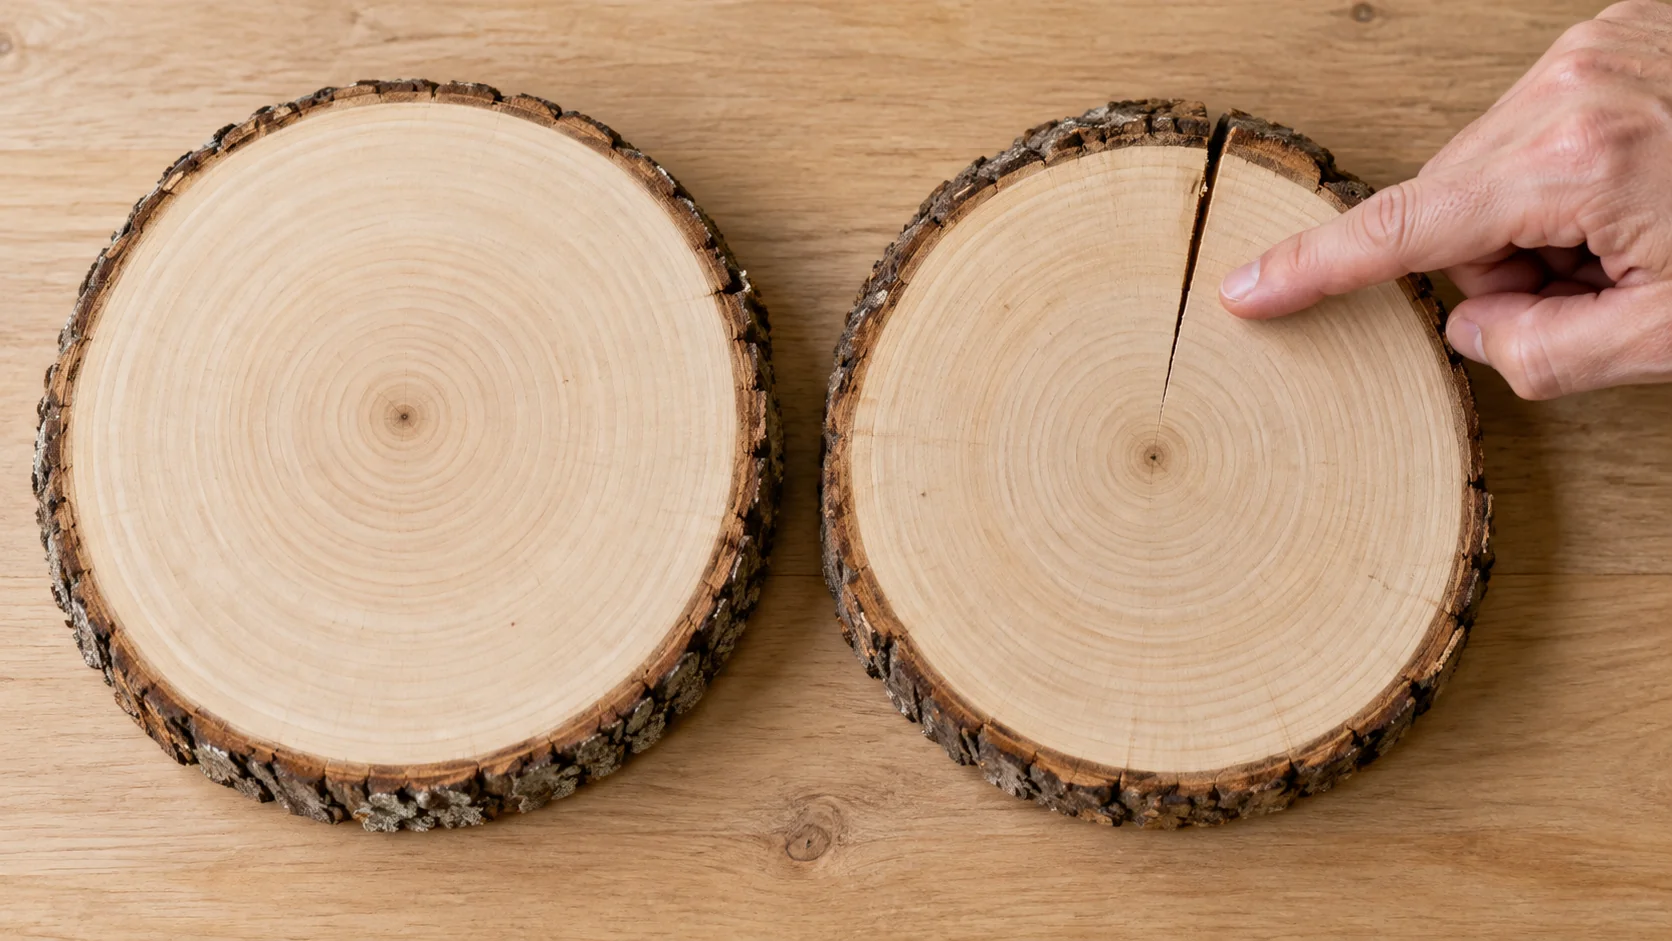
- Cracks and splits: keep them out of the design area. A split can spoil a letter or weaken a hanging hole. Return unsuitable pieces rather than trying to burn across the defect.
- Loose bark: do not rely on it to hold a fixing. Keep the main artwork on the sound wood face and handle the edges gently.
- Knots and streaks: decide whether they work with the design. A dark knot in the middle of a pale portrait may be more distracting than one near a border.
- Glue or layered edges: check how the blank is made. The word “natural” does not prove that a board is free of adhesive or surface treatment.
- Surface condition: look for dents, raised fibers and scratches. A smooth-looking photograph cannot confirm the condition of your piece.
Do not use smell, color or a test burn to identify an unknown coating. If the seller cannot confirm the material and treatment, choose a different blank. Our wood-safety guide helps with that decision.
Give small slices a simpler design
A little bark-edged round looks charming, but its usable center can be much smaller than the advertised diameter. Leave space for the bark, any hanging hole and a margin around the lettering.
Many inexpensive ornament packs are pine. They are not interchangeable with basswood: prominent grain can make consistent marks harder to achieve. For early practice, a clear basswood face is a more forgiving starting point than a tiny round with strong growth rings.
- Check the species. “Natural wood slices” alone is not enough to choose a burning surface.
- Check the smallest stated size. Draw your motif at that size before ordering a mixed pack.
- Use a short design. One initial, a simple leaf or a small star needs less room than a quote.
- Leave the hanging area clear. Keep the design away from the hole and any cracks, and fit cord only after all heat work is finished.
Pre-drilled holes save a step; they do not establish the species, treatment or quality. If a pack is better suited to drawing or painting, use it for a no-heat craft instead of treating it as a pyrography recommendation.
Prepare the surface before transferring a design
Even a pre-sanded blank may benefit from light preparation. Follow the blank supplier’s advice and inspect the result before tracing. Do all sanding before setting up the hot tool.
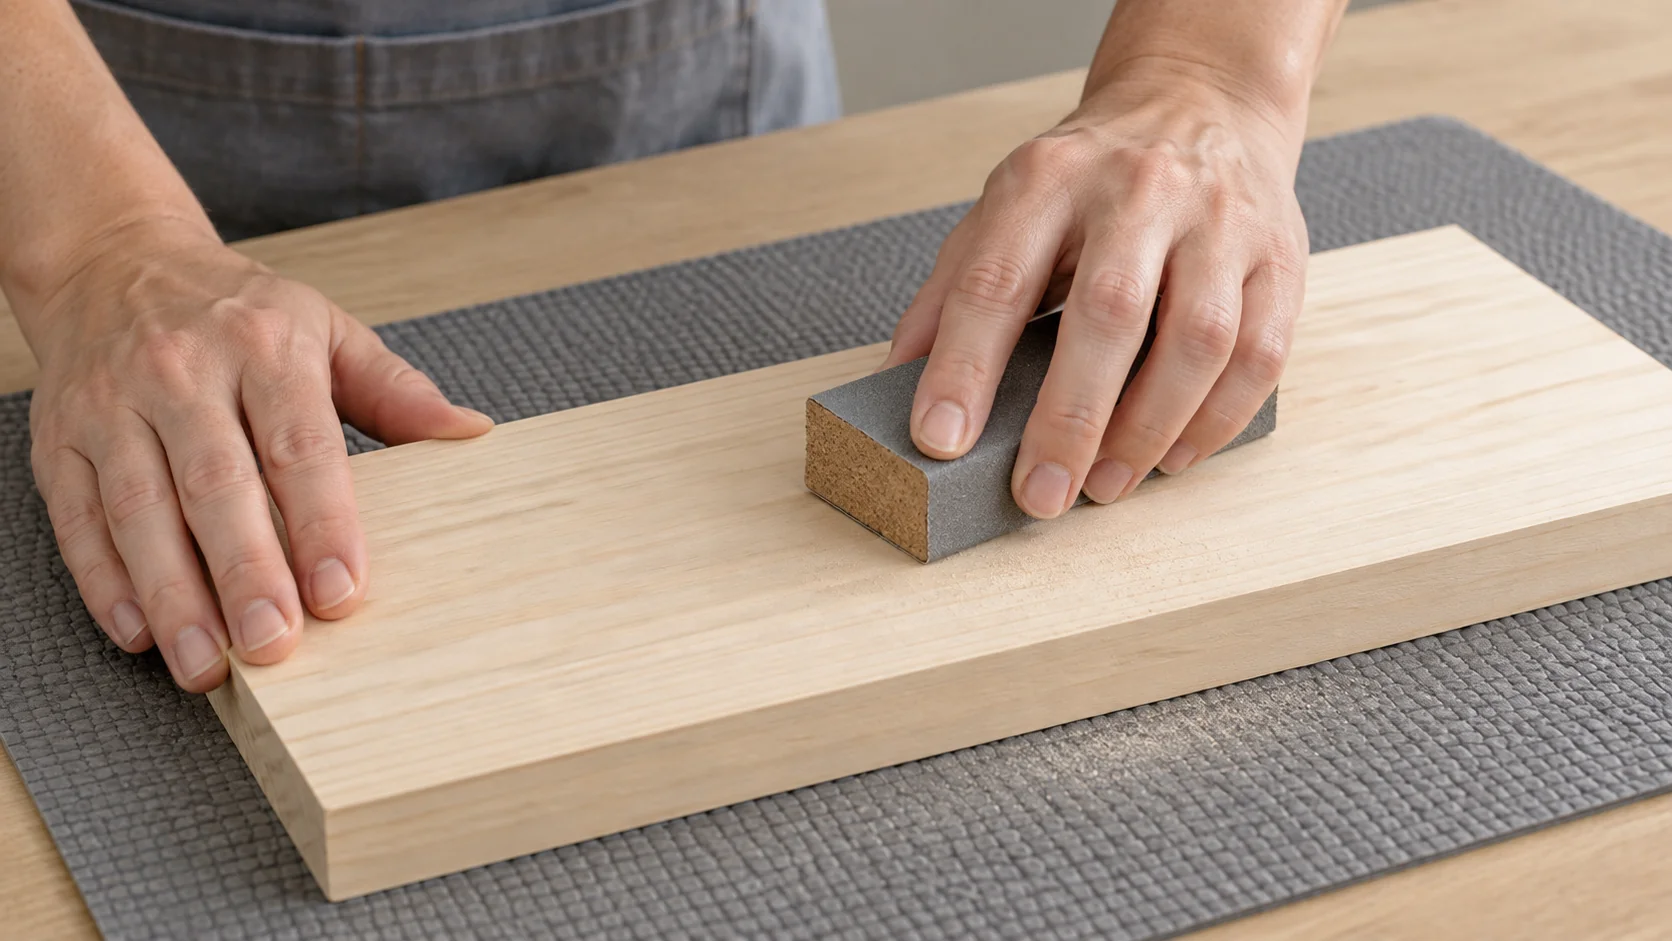
- Support the wood securely. Work on a stable surface where the piece will not slide.
- Sand lightly with the grain. Use a block and suitable fine abrasive. Avoid rounding a crisp bevel or digging a hollow into the drawing area.
- Remove the dust. Use appropriate dust control while sanding, then clean the surface before tracing or heating. Do not blow a cloud of dust across the work.
- Check under side lighting. Look for scratches and raised fibers that could interrupt a fine line.
- Test on matching scrap. Try a line and a small shaded patch before committing to the finished blank.
Leave the surface bare for burning. Apply any color, oil or coating only after all hot-tool work is finished. The design-transfer guide is the next step once the surface is ready.
Match the blank to its finished use
Indoor decorations, outdoor signs and food-serving pieces have different requirements. A handle-shaped craft blank is not automatically kitchenware, and applying mineral oil does not make an unsuitable board food-safe.
- Indoor plaques: choose the shape around the pattern, then plan secure mounting for its weight.
- Outdoor signs: check the wood and finish for the intended exposure. Basswood has poor natural decay resistance, so do not assume that a bark edge makes it weatherproof.
- Serving boards: begin with a suitable, genuinely unfinished board intended for that use. Keep decoration away from food and knife contact, and follow the serving-board project guide.
Buy one manageable blank and a matching practice piece first. Move to multipacks when the species, size and surface have proved useful for your projects. For a complete setup, see our starter-kit shopping list, then try a name plaque or welcome sign.