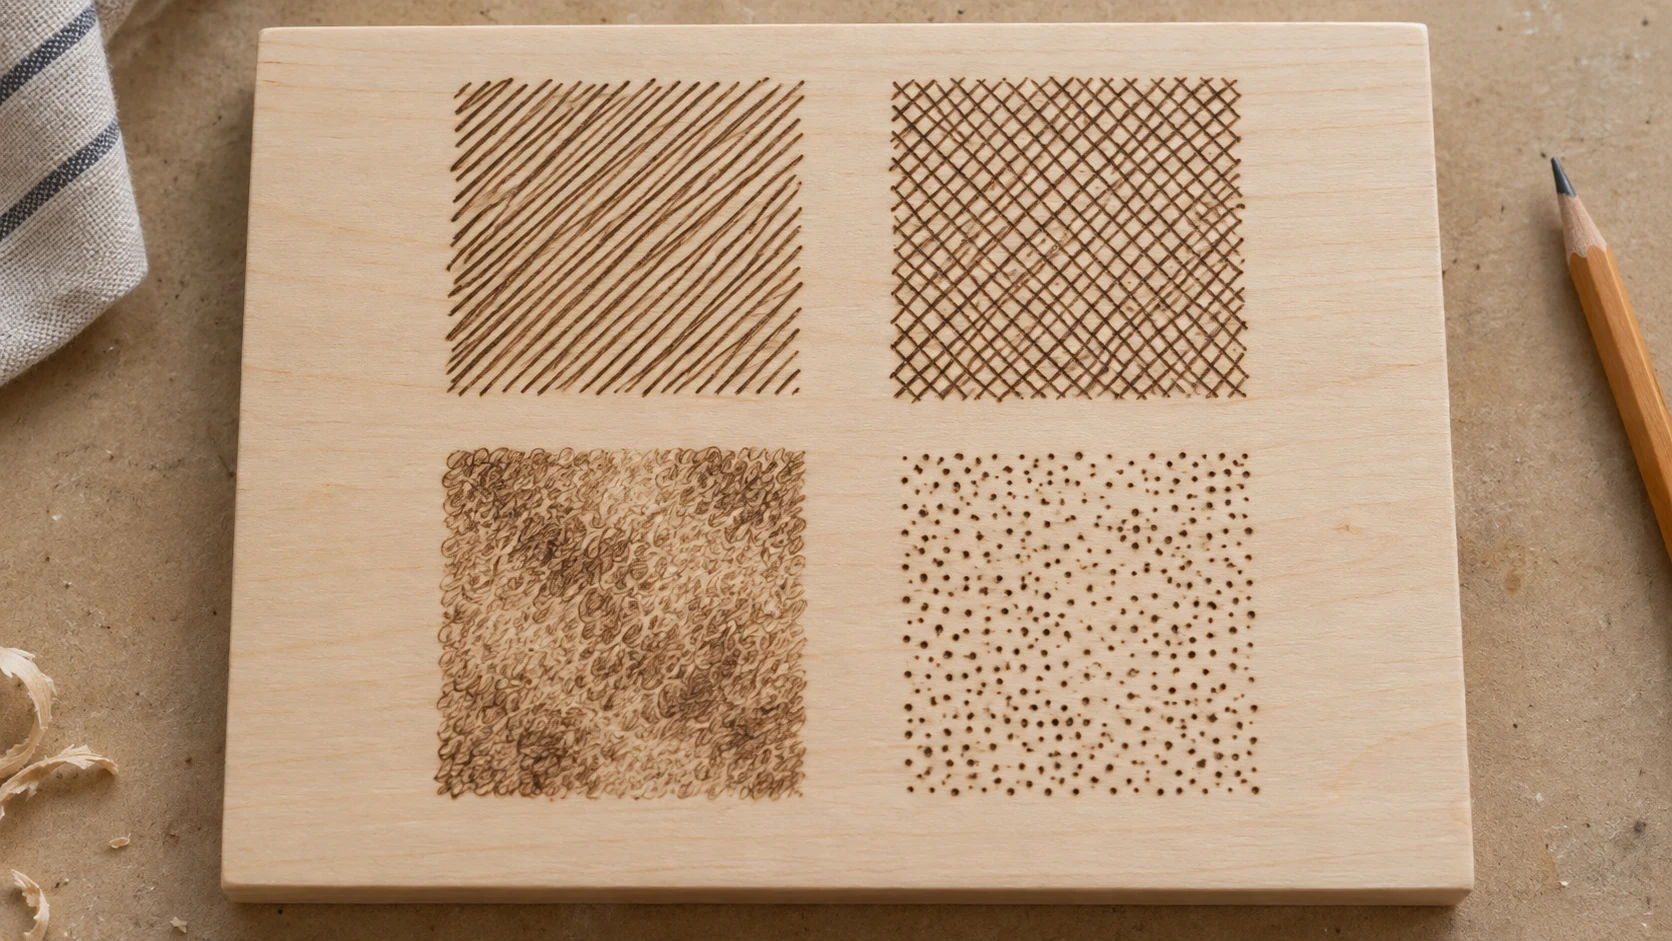
Shading gives a flat outline form and texture. You can build it with lines, crossed lines, small curved strokes or dots. The useful starting point is a pale mark you can repeat, then deepen gradually where the design needs it.
Practice on a small piece of suitable unfinished wood before working on a picture. These five exercises help you control tone without relying on a universal temperature setting or pressing harder.
Prepare a small practice board
Choose known, untreated solid wood with a smooth face. Remove loose sanding dust before beginning. Basswood is a practical practice surface; an offcut from your actual project is especially useful because it lets you test the same material.
If you want a larger shading sampler or finished design, the Make Market 11-by-14-inch basswood oval offers a lightly sanded, kiln-dried surface. Measure the usable face before laying out your sections. Suitable scrap is enough for practicing each technique.
- Draw a few small practice areas. Leave space between them so you can compare the marks clearly.
- Test the tip you plan to use. Warm the tool according to its instructions and find a setting and pace that produce a light brown mark.
- Change one variable at a time. Compare movement, contact or heat separately rather than changing all three.
- Keep the pressure light. The aim is surface tone, not a groove pressed into the wood.
Tip shape, wood and movement all influence the result. The temperature guide explains the test process. Use the proper pen holder and follow the safety guide for your work area.
1. Parallel strokes for directional shading
Use for: areas where the direction of the marks helps the design, such as a leaf, strands of hair or horizontal water marks. A suitable shader can also cover a broader area with overlapping strokes.
- Make a row of short strokes that follow the same direction. Keep your hand in a comfortable range.
- Begin with a light tone and similar spacing. Lift the tip before pausing or repositioning the wood.
- Add another light pass where you need more tone. Overlap consistently rather than repeatedly darkening a single strip.
- Stop and compare the patch with untouched wood before adding more.
Visible strokes are useful when they describe texture. For a softer area, practice closer overlap and a lighter first pass. You do not need a fixed number of passes or a set temperature increase between them.
2. Cross-hatching for visible texture
Use for: an illustrative look where intersecting lines are part of the finished effect. It suits textured backgrounds and stylized shading, rather than automatically making every surface look realistic.
- Burn a small group of light parallel lines.
- Rest the pen in its holder and turn the board to make the next direction comfortable.
- Add a second group crossing the first. Keep the lines separate enough to see their spacing.
- Increase density only where the shadow should deepen, leaving more pale wood in lighter areas.
The intersections naturally receive more burning. Avoid lingering on them, especially when adding a third direction. Judge the overall value from a little farther away as well as close up.
3. Small circular strokes for less directional tone
Use for: patches where long straight strokes would distract from the form. Small overlapping loops or curved movements can produce soft texture, but they do not guarantee a perfectly smooth surface or hide the grain.
- Test a light patch with a suitable shader, using small relaxed curves.
- Overlap the marks without stopping the hot tip in one place.
- Lift clear whenever you need to pause. Restart gently in an adjacent area.
- Build another light layer only after checking where the gaps and darker patches are.
If individual rings dominate the patch, try smaller, lighter movements on scrap. If it becomes blotchy, check overlap, contact and surface preparation before increasing heat. Our troubleshooting guide helps separate those causes.
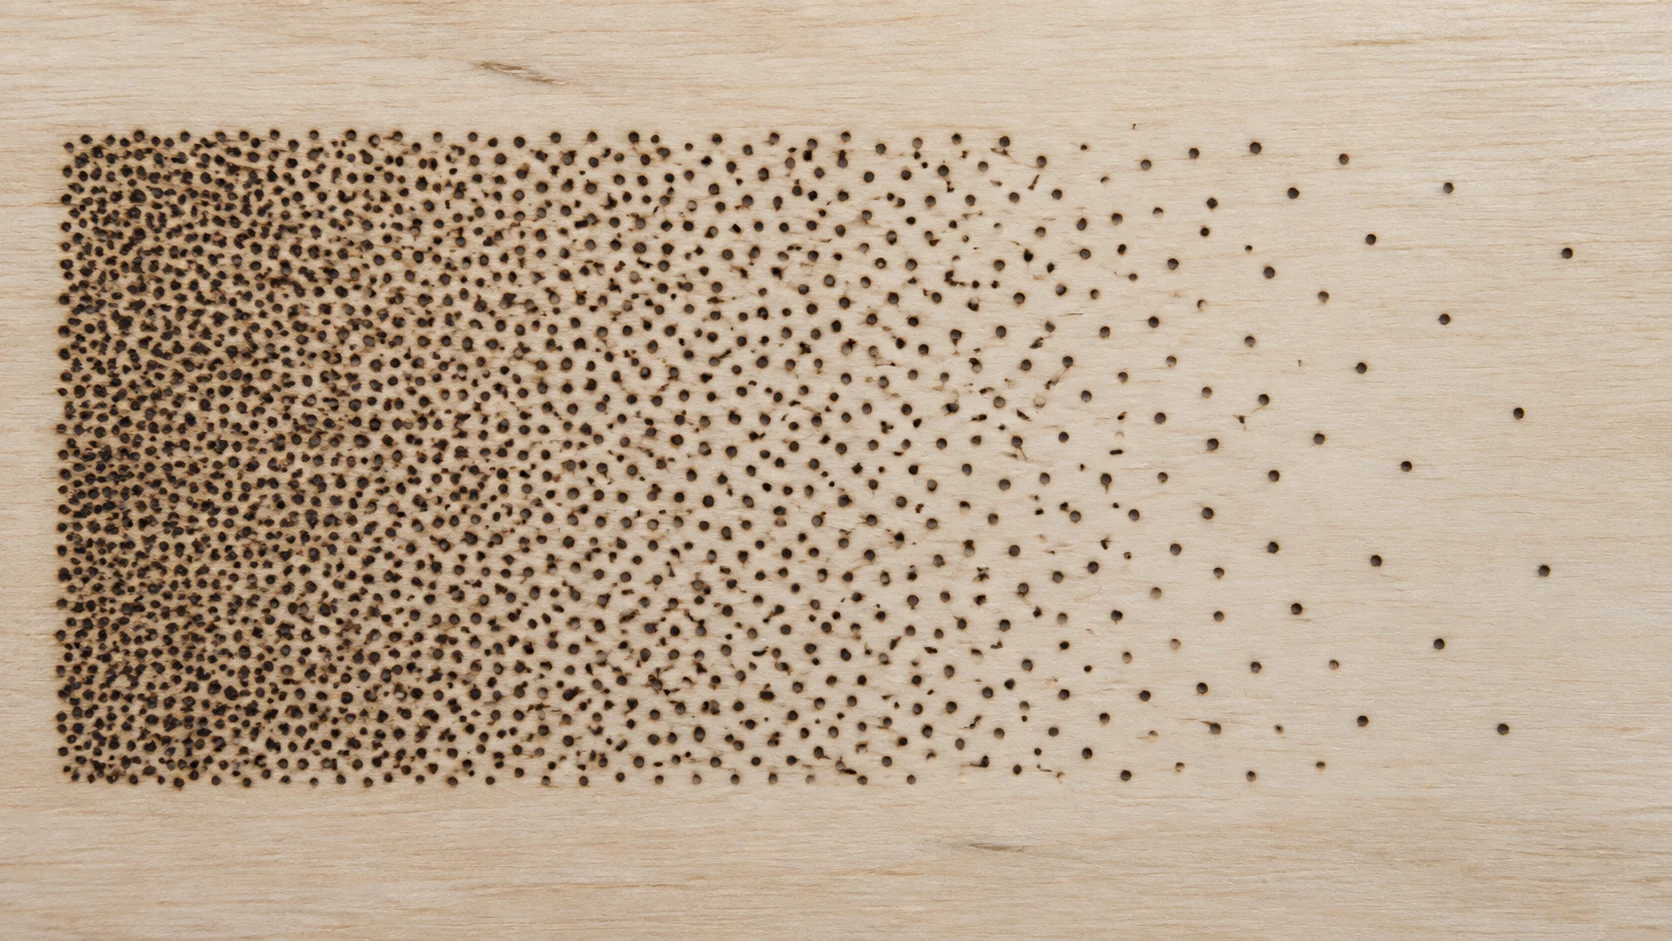
4. Stippling for tone made from dots
Use for: textured accents, seed heads, rough surfaces or an intentionally dotted illustration. Begin by changing the spacing of similar dots, so you can see how density affects the tone.
- Choose a compatible tip that makes a controllable small dot on scrap.
- Touch and lift, keeping the contact brief and the pressure gentle.
- Place dots farther apart in the light area and closer together in the shadow.
- Add dots gradually between existing marks rather than holding down longer to force a darker patch.
Allow some natural irregularity in placement unless you want a patterned grid. If dots become broad scorched spots, reduce the heat or contact time on the next test. Stippling works best when you are comfortable taking your time.
5. Build a light-to-dark gradient
A gradient is a gradual change in tone. You can make it with overlapping strokes, small circles or dots. For your first attempt, use a light, repeatable setting and build the darker end with additional marks.
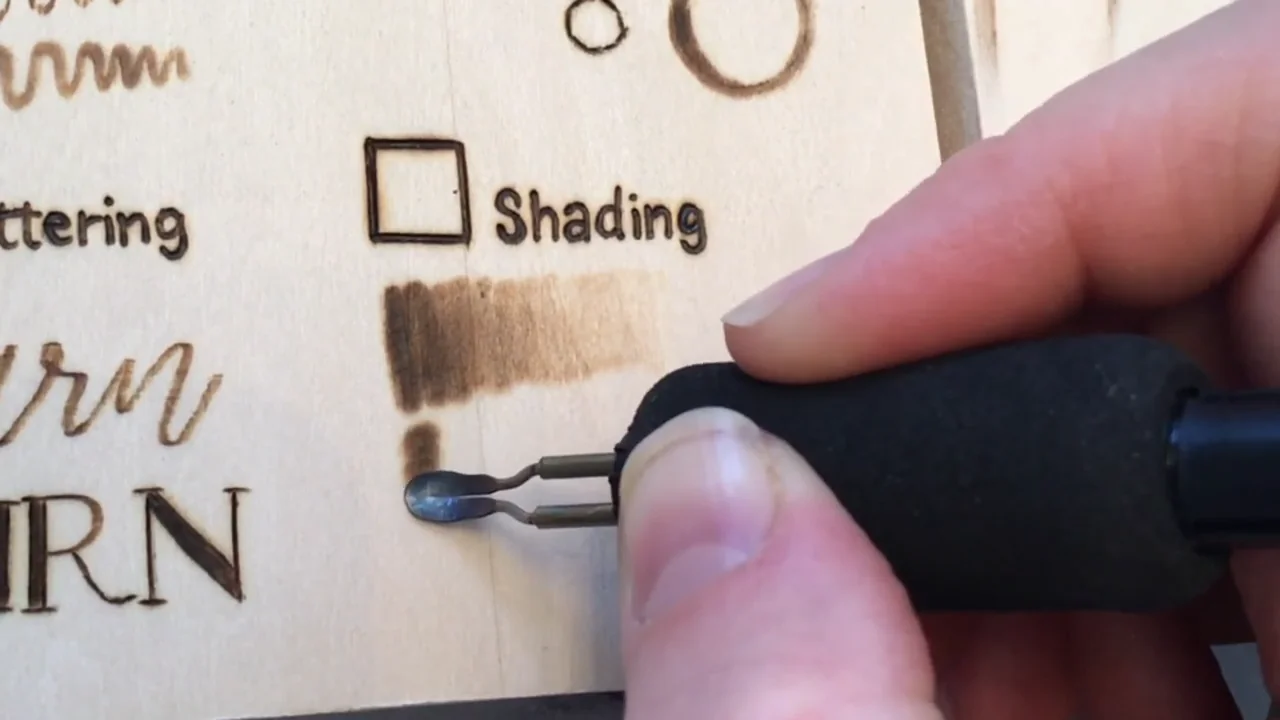
- Reserve the light end. Decide where untouched wood or the palest tone should remain.
- Make a light base. Use your chosen stroke, stopping before the highlight.
- Deepen a smaller area. Add another light layer toward the dark end. Vary the ends of the strokes gently so they do not form a hard boundary.
- Compare the transition. Fill pale gaps carefully. Stop before the middle becomes as dark as the shadow.
You can explore heat changes later, but let the tool respond and test before returning to the work. Constantly changing the dial makes it harder to identify why a mark changed. Never try to lighten an over-dark area by adding more heat.
Combine the marks in a simple leaf
Draw a large leaf with one center vein. Decide which side catches the light, then reserve a pale strip there. This gives you a small design with a clear reason for every shaded area.
- Leaf surface: use gentle strokes following its curve, keeping the light side open.
- Shadow near the vein: add a few controlled layers instead of a heavy black outline.
- Optional background: try sparse dots or a small cross-hatched patch on a separate sample before adding it to the picture.
You do not need every technique in one piece. Pick the mark that helps describe the subject. Browse the project ideas for another small design once the practice patch feels controllable.
Use the tip you can control
Both solid-point and wire-nib tools can shade. A broader working face can cover an area efficiently, while a smaller tip can make lines or dots. Compatibility and control matter more than owning a large assortment.
Check the tips and nibs guide before changing shape. If you are choosing a whole system, the kit comparison separates beginner and upgrade options.
When a tip starts dragging, follow its manufacturer’s cleaning instructions rather than compensating with pressure. Let the equipment cool before hands-on inspection, and use the tip-care guide for the next check. Keep a successful practice patch nearby as a reference for your own wood and tool combination.