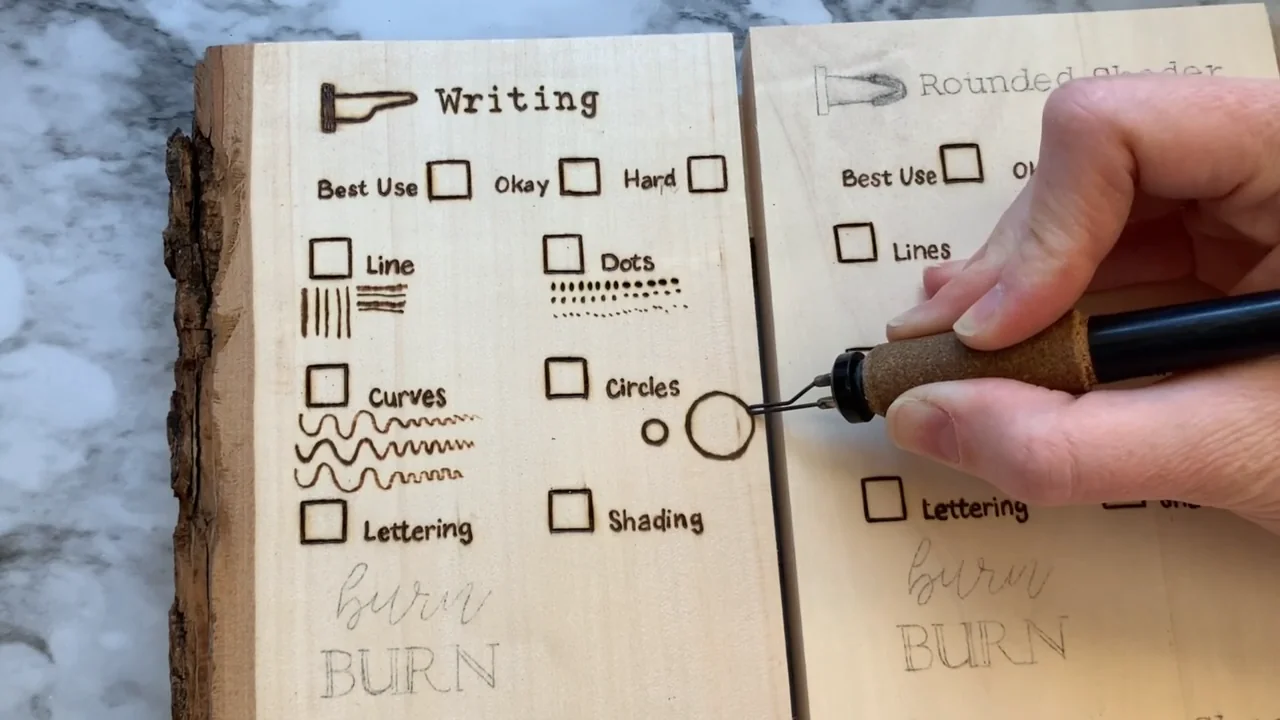
Build a small practice board over seven sessions: lines, curves, shading, a gradient, textures, lettering and a simple leaf. Treat each day as one exercise you can repeat. There is no deadline for getting a smooth line or an even shade.
Before you begin: use suitable unfinished wood, a compatible pen tip and the stand supplied for your tool. Prepare a stable, ventilated workspace and follow your burner’s instructions. Start on scrap from the same wood as your practice piece. Our beginner guide covers the setup.
Choose a comfortable session length—around 15–20 minutes is a suggested starting point, with breaks whenever you need them. Keep a pencil beside you to label each trial. Use the free practice sheets as drawing and transfer guides; remove the paper before burning the design on wood.
Day 1: Find a steady line
Make: two short rows of straight lines. A writing tip or another compatible tip suited to lines will work; you do not need a particular pen format.
- Draw a few pencil guides roughly 2 inches long, leaving space between them.
- Test the tip on scrap. If your tool has adjustable heat, start low and increase gradually until a light mark forms at a comfortable pace. Allow it to settle after an adjustment.
- Burn one row with a light touch and a steady movement. Lift clear at the end of each stroke.
- Keep the heat setting the same and vary your speed slightly on the second row. Compare the marks.
Check: look for similar line widths and fewer dark spots at the starts and ends. If you are digging a groove, ease your grip and pressure. Heat, contact time, tip shape and the wood all affect the result; a dial position is not a universal temperature setting.
Day 2: Turn lines into curves
Make: a row of C-shapes, a row of gentle waves and a few circles.
- Draw the shapes in pencil, large enough that the turns feel comfortable.
- Support your arm wherever it feels stable without restricting the stroke. Keep your fingers clear of the hot end.
- Lift the pen and rotate the wood when a direction becomes awkward. You do not have to complete a circle in one movement.
- Try the same shapes again, focusing on one problem such as a dark corner or a sudden change in width.
Check: compare the top and bottom of each curve. If a turn is darker, you may be slowing down there. Practise the movement with an ordinary pencil before the next burn.
Day 3: Fill a small patch evenly
Make: three separate shaded squares, each about 1 inch wide.
- Choose a compatible shading tip if you have one. Follow the manufacturer’s cooling and replacement procedure before changing tips.
- Test its contact angle on scrap, then fill the first square with light, overlapping strokes.
- Use the same stroke direction or small overlapping circular movements throughout that square. Avoid repeatedly darkening one isolated spot.
- Aim for a light patch, a medium patch and a darker patch in the three squares. Add another light layer only where it helps.
Check: look for pale gaps, dark seams and grooves. Try a smaller stroke or a different tip angle on the next square. You do not need to reach black, and there is no fixed number of passes for a particular shade.
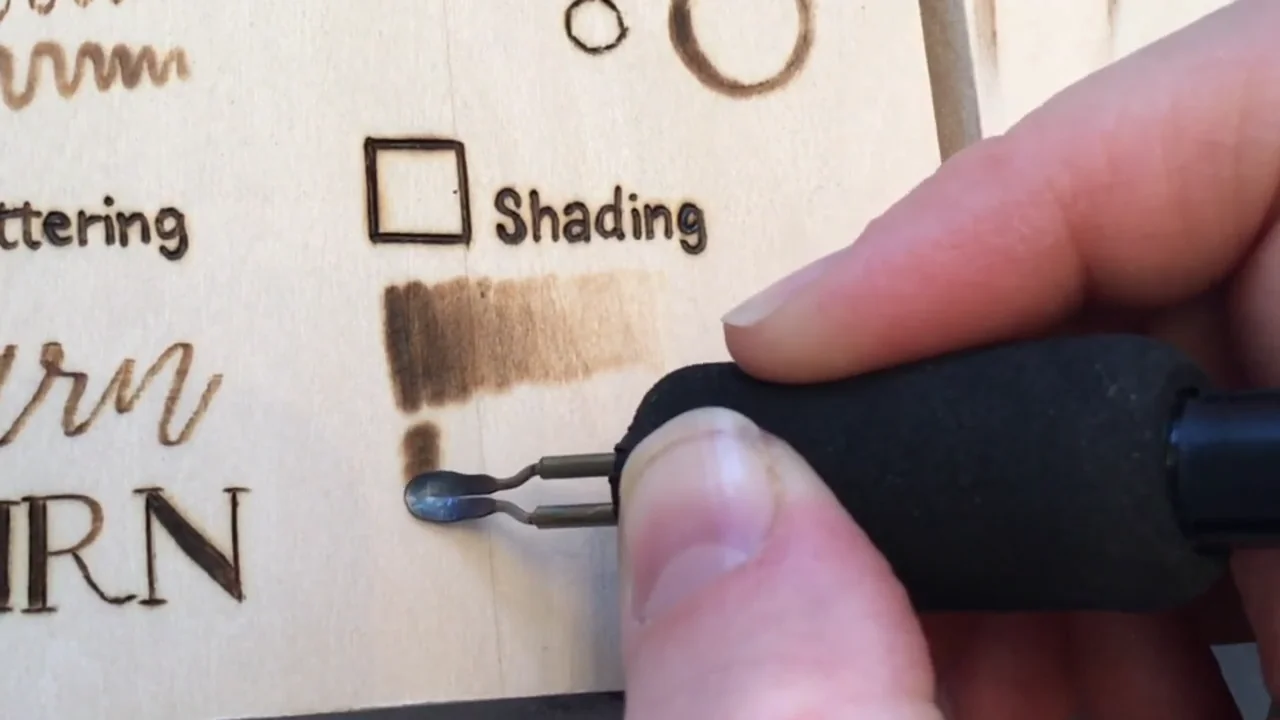
Day 4: Blend light into dark
Make: one small rectangle that fades from dark on the left to light on the right.
- Leave the far-right edge as bare wood to give yourself a clear light end.
- Lay down a light base across the rest, using the stroke you found easiest yesterday.
- Build more tone toward the left. End successive strokes at slightly different positions so they do not form a straight dividing line.
- Pause and look at the whole rectangle before adding another layer.
Check: the transition should become less abrupt with practice. If one area goes too dark, start another small sample and change one thing at a time. Burning over a dark patch cannot make it lighter. Our shading guide explains other ways to build tone.
Day 5: Try three textures
Make: three small texture patches: dots, hatching and cross-hatching.
- Dots: touch down lightly and lift. Start with widely spaced marks, then place them closer together in another area. Avoid stabbing or pressing the tip into the wood.
- Hatching: draw a group of short parallel lines. Compare an open group with a more closely spaced group.
- Cross-hatching: add a second set of lines at an angle to the first.
Check: compare how spacing changes the apparent darkness. Keep the dot size or line weight reasonably similar while testing spacing, so you can see what made the difference.
Day 6: Burn a short word
Make: a simple word such as JOY in clear, open letters. Start with single lines rather than tiny lettering or a thick script.
- Sketch or transfer the letters lightly, then remove the paper.
- Practise the trickiest stroke on scrap before working on the word.
- Burn in comfortable sections. Lift the tip when you pause or turn the wood.
- Approach a join lightly and inspect it before going over it again. There is no universal waiting time that prevents a dark restart.
Check: is the word easy to read, with open spaces inside the letters? Keep your first attempt and compare it with the next. The lettering guide covers layout and joining strokes in more detail.
Day 7: Put the marks into a small project
Make: a simple leaf on an unfinished wood square, roughly 4 × 4 inches. Give it an outline, a central vein and a small shaded area.
- Sketch a leaf that leaves a clear margin around the wood.
- Test your line and shading marks on matching scrap.
- Burn the outline and main vein lightly. Rotate the wood as needed.
- Add a little shade to one side, keeping some bare wood for contrast. Use a few short lines or dots for texture if they suit the design.
- Stop, let the work cool and compare it with your first practice marks.
Check: note one improvement and one thing to repeat next time. More consistent lines, gentler starts or a clearer light-to-dark range all count. Keep the board as a reference and revisit the exercise that would help your next project most.
For more practice, choose another design from our wood-burning project ideas or return to the printable practice pack.