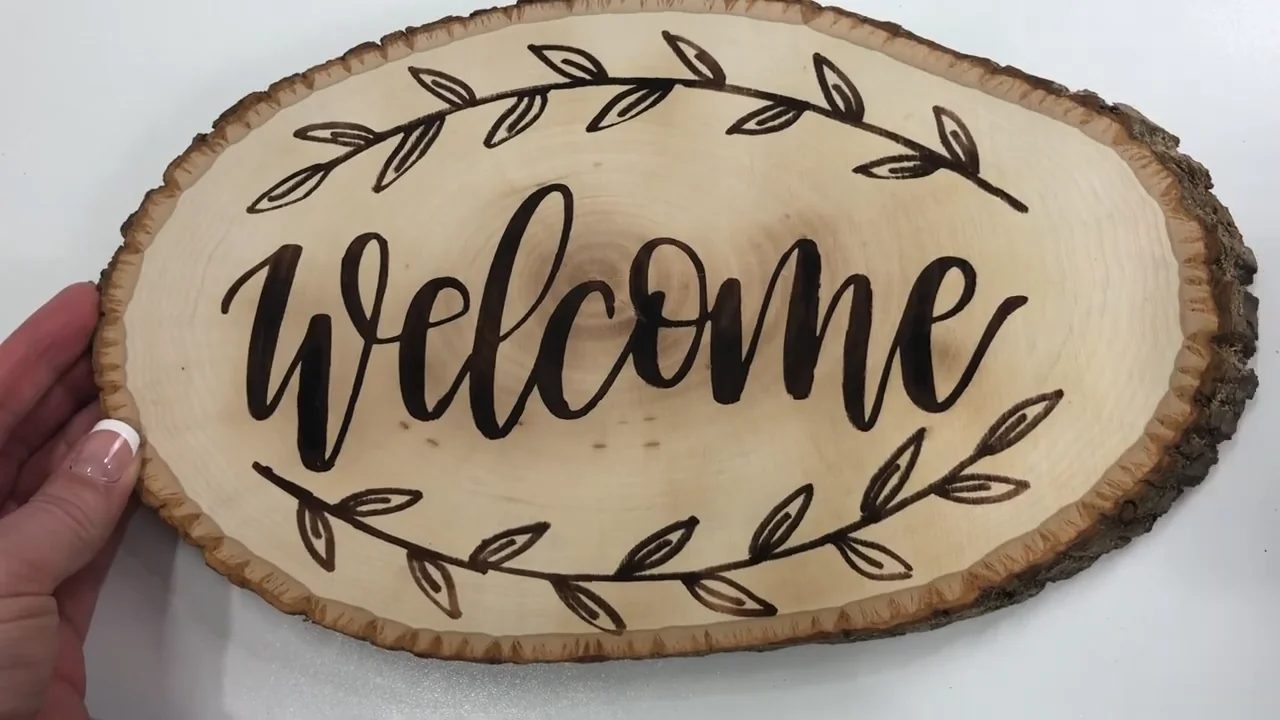
A live-edge welcome sign combines a simple message with the natural shape of the wood. Keep the lettering large, leave room around it, and let the edge provide most of the decoration.
This project uses a wood-burning pen for the lettering. Plan an indoor entryway sign first, or a sheltered porch sign with a suitable exterior finish. Allow extra time for the finish to dry before hanging it.
Choose a dry blank with room for the word
Start with known, unfinished wood that sits flat. Basswood is a useful choice for a first lettering project because its pale surface makes the design easy to see. Avoid treated, painted or previously sealed wood.
The Foggy Bottom live-edge basswood planks come as four kiln-dried, sanded blanks, approximately 11–14 inches wide by 16 inches long. Each has a different outline, so choose your layout after you see the actual piece.
- Look at the writing area. Keep letters clear of cracks, knots and deep surface marks.
- Check the edge. Bark that already moves or flakes is unlikely to make a durable border. A natural edge can still look attractive with loose bark removed.
- Choose the location now. An indoor wall is the easiest option for a bark-edged sign. A covered porch still exposes wood to moisture and changing temperatures.
Need a smaller blank? Our wood blanks guide explains the differences between slices, planks and panels.
Gather the tools and smooth the face
You need a wood-burning pen and its holder, a pencil, paper, low-tack tape, an eraser, a sanding block and a scrap of the same wood for practice. Add transfer paper if you want to trace a printed design.
A solid-point pen can handle this project. A wire-nib tool is another option if you already use one. Pick a tip you can control comfortably rather than buying a new station just for one sign. See our solid-point and wire-nib comparison if you are choosing your first tool.
- Prepare the surface before drawing. Sand along the grain until the face feels even. Follow your chosen finish’s preparation instructions too.
- Remove the dust. Use a clean brush or suitable dust-removal method so grit does not sit under the template.
- Set up a clear workspace. Keep the cord away from the work, use the tool’s holder between strokes, and provide ventilation that carries smoke away from your face.
Complete all burning before applying oil, paint or a clear finish. Unplug the pen and let it cool before changing tips unless its manufacturer provides a different procedure.
Make the lettering fit the wood
Write or print “Welcome” on paper first. Simple block letters are easier to trace and fill than a script with tiny loops. If you choose script, leave enough space inside letters such as “e” and “o” so they remain readable after burning.
- Set the reading direction. Turn the blank until the word can sit comfortably across its widest usable area.
- Try the paper layout. Leave a visible margin between the lettering and the edge. Judge the balance by eye, not just by the widest points of the bark.
- Keep decoration secondary. Two small leaf sprigs or a short underline are enough. Check the sign from a few steps away before transferring anything.
Transfer a light, clean outline
Tape the template along one edge so it lifts like a flap. Place PSLER graphite transfer paper beneath it, marking side toward the wood. Test a small line on scrap first so you know which side transfers and how much pressure it needs.
Trace only the outline you intend to burn. Lift one corner to check the marks before removing the tape. Keep them faint enough to erase later; pressing hard can leave grooves that remain visible beside the burn.
Outline first, then build up the darker strokes
Practice a straight line, a curve and a filled patch on scrap. Aim for a controlled brown mark with light pressure. If the tip catches or leaves a wide dark halo, adjust the heat and movement before touching the sign.
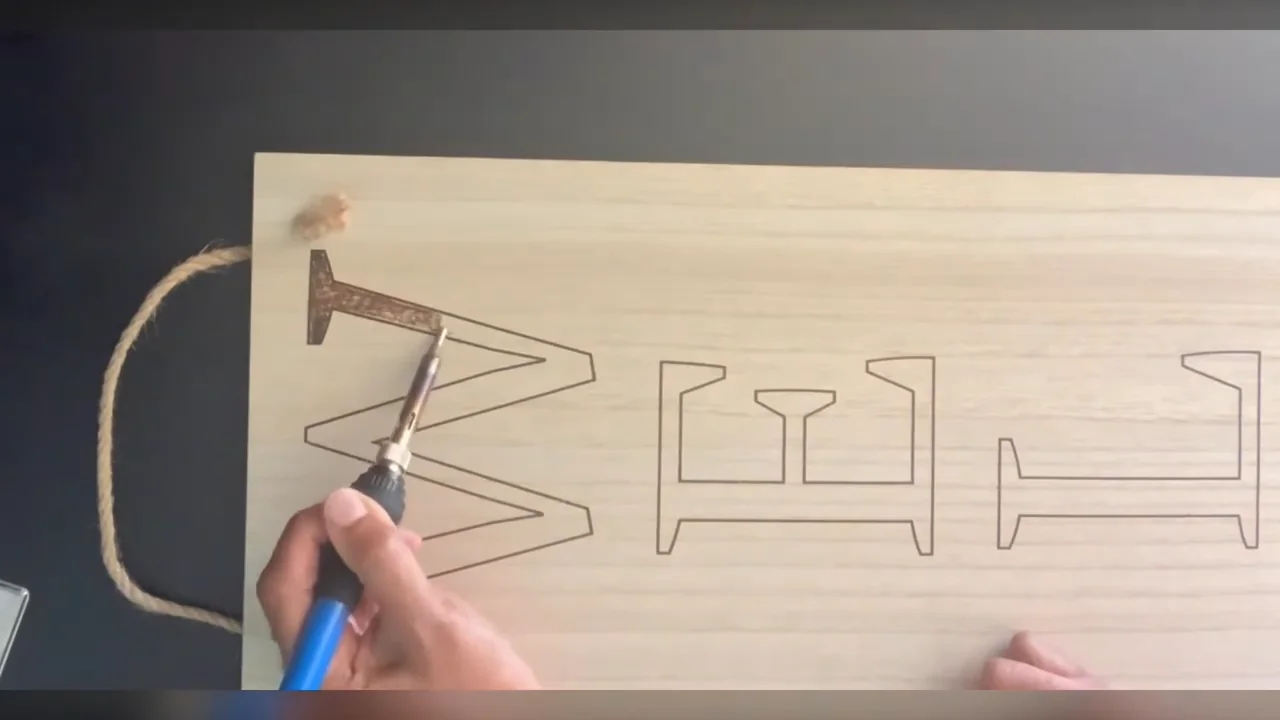
- Follow a short section of the outline. Move steadily and lift the tip before you pause. Several manageable strokes are easier to control than one long sweep.
- Turn the wood for curves. Put the pen in its holder while repositioning the blank. Keep your wrist comfortable.
- Fill wider letters gradually. Use small overlapping strokes or dots inside the outline. A textured fill works well for bold lettering; you do not have to make it solid black.
- Check the whole word. Compare the darkness across the letters before adding another pass. Preserve the small open spaces that keep the word readable.
- Add the border last. Keep leaves and flourishes lighter or simpler than the main message.
Once the wood and tool are cool, gently erase remaining pencil marks. If a burn runs outside the line, stop and assess it before widening the entire letter to hide it.
Choose the finish for where it will hang
For an indoor sign, choose a finish that suits the look you want and test it on a burned offcut first. Clear finishes can change the wood’s color and the contrast of the lettering. Our finishing guide covers the main options.
For smooth wood on a sheltered porch, Varathane Water-Based Ultimate Spar Urethane in satin is an exterior coating option. Its manufacturer excludes rough-sawn surfaces, so do not assume it will protect rough bark or hold loose bark in place. Keep a bark-retaining sign indoors if the edge cannot be prepared appropriately.
- Prepare and test. The manufacturer specifies 120–150-grit sanding for new wood. Remove dust and test the coating before finishing the sign.
- Allow enough coats and drying time. For this water-based product, the instructions call for at least four coats, with at least two hours between coats and the surface dry and hard before recoating. Allow longer in cool or humid conditions.
- Follow the label through the final coat. The stated wait is 24 hours before light use and three days before normal use. Check the current can for application conditions and sanding between coats.
A clear coat does not turn a live-edge craft blank into a maintenance-free outdoor sign. Keep it out of direct rain and inspect it for cracks, peeling finish or loose bark.
Hang it securely and keep it looking good
Choose hanging hardware rated for the sign’s weight and suitable for the wall or door. Fix it into sound wood, not bark. Check the blank’s thickness so screws cannot emerge through the decorated face, and follow the hardware maker’s pilot-hole instructions.
Test the balance over a padded surface before hanging. Keep it clear of a door’s swing and away from spots where it can repeatedly knock against a wall. For a porch, inspect the fixings and finish regularly and bring it indoors if the wood starts to deteriorate.
Giving it as a gift? Include a short note with its intended location and finish-care instructions. For another small project, try a personalized name plaque.