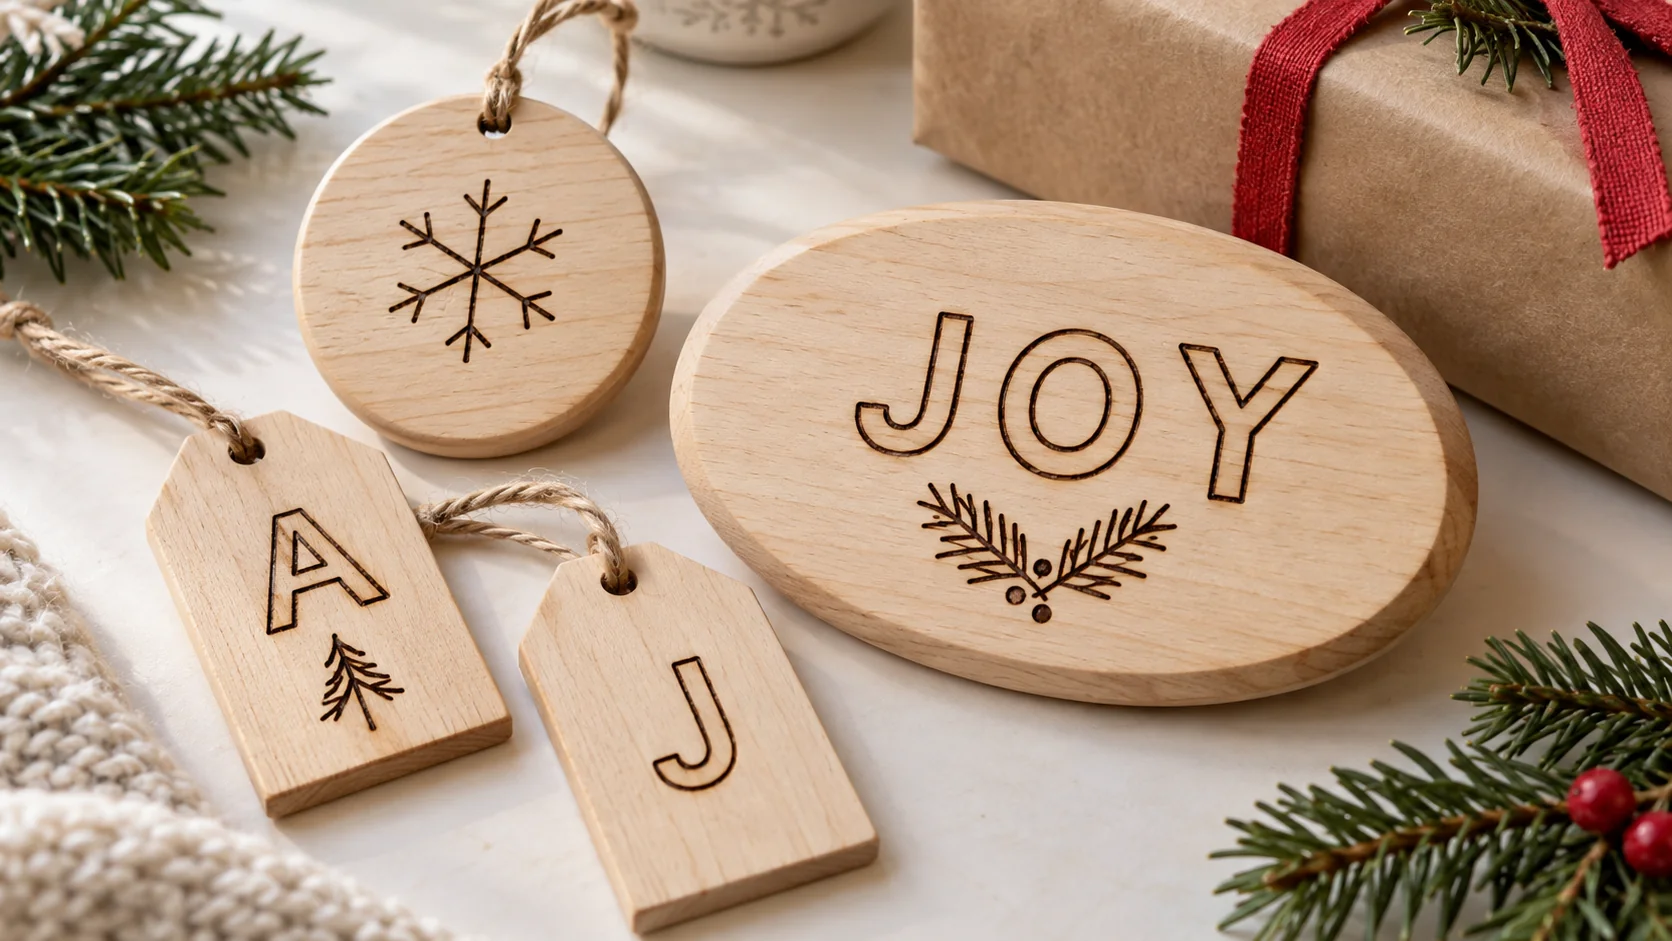
A small snowflake ornament, a reusable gift tag and a simple JOY plaque make a useful starting set of Christmas wood-burning projects. Choose one design first, make a test piece, then repeat it if you enjoy the process.
Keep the artwork modest: clear outlines, a short name or initial, and enough bare wood around the design. You do not need elaborate shading or a new collection of tools to make a personal gift.
Choose your project and prepare the blanks
- Ornament: a small, sound wood round with enough clear space for a snowflake or initial. A pre-drilled hole saves a separate drilling step.
- Gift tag: a small smooth tag or round large enough for an initial and one simple symbol.
- JOY plaque: a larger shaped blank with room for three letters and a small border.
Choose a known, unfinished wood suitable for burning. Basswood is a practical starting point. Many inexpensive bark-edge ornament packs are pine, and some thin cutouts are plywood. Do not treat every “wood craft” pack as the same material. Check the species, construction and surface treatment before ordering.
For the JOY sign, the Make Market 11-by-14-inch basswood oval provides a larger, lightly sanded surface. It is a sign plaque, not a small tree ornament. Confirm that the actual blank is untreated and unfinished, inspect it for defects, and size your lettering to the usable face.
Gather your burner and its holder, a pencil, eraser, paper, low-tack tape and matching scrap wood. Optional PSLER graphite transfer paper can help with lettering. Save ribbon, twine and gift wrapping for the cool, finished pieces.
Prepare rough areas and remove sanding dust before tracing. Set up a stable, ventilated work area, following the burner instructions. Keep paper patterns and holiday decorations away from the hot tool. Our wood-blanks guide covers what to inspect before starting.
Make a simple snowflake ornament
Use six lines radiating from a center point, then add one small V-shaped branch near each tip. Keep the design well inside the edge and away from the hanging hole. A few clean lines will read better than a crowded miniature pattern.
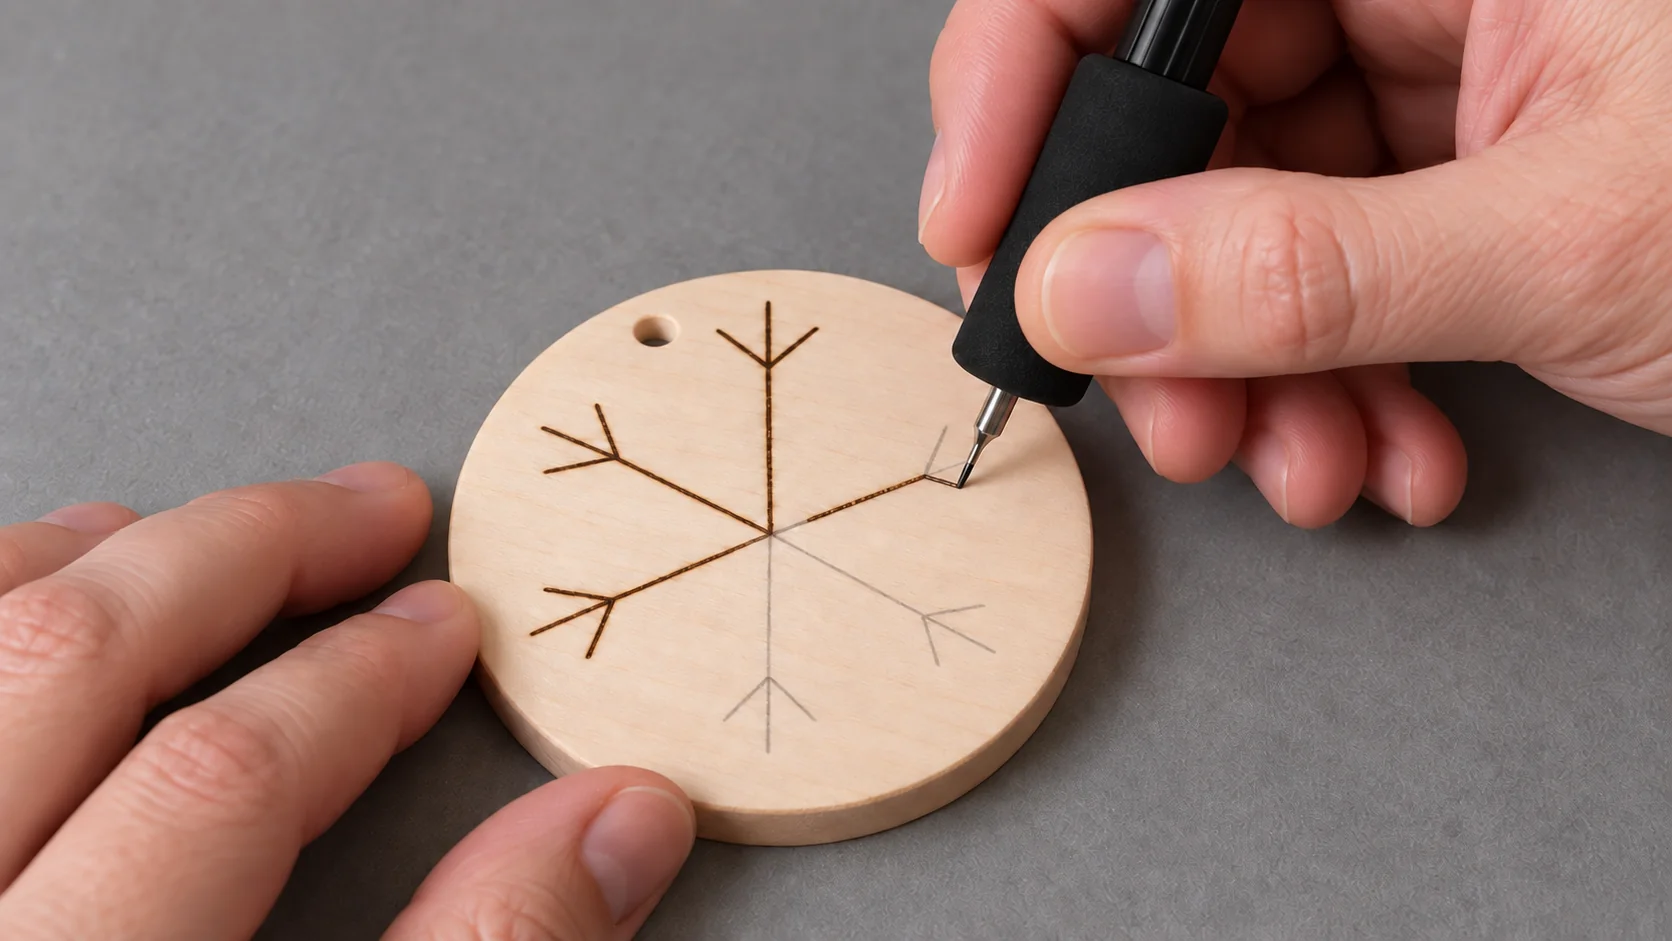
- Sketch lightly. Mark the center and six evenly spaced arms in pencil. Check the whole arrangement before burning.
- Test on matching scrap. Find a comfortable setting and movement for the actual wood and tip. There is no single temperature that suits every burner.
- Burn short strokes. Follow one arm at a time with light pressure. Lift the tip before pausing so the end does not become a dark blob.
- Turn the piece for the branches. Rest the pen in its holder while repositioning the wood. Add the short V branches after the main lines.
- Cool before threading. Unplug the tool when finished and let the ornament cool fully before fitting the hanging cord.
If six arms feel fiddly, start with a single initial or a simple evergreen silhouette instead. Make the first ornament a practice piece rather than promising a whole matching set immediately.
Make a reusable initial gift tag
An initial plus a tiny tree or star is enough for a small tag. Put any longer gift message on the paper wrapping, leaving the wooden tag easy to reuse.
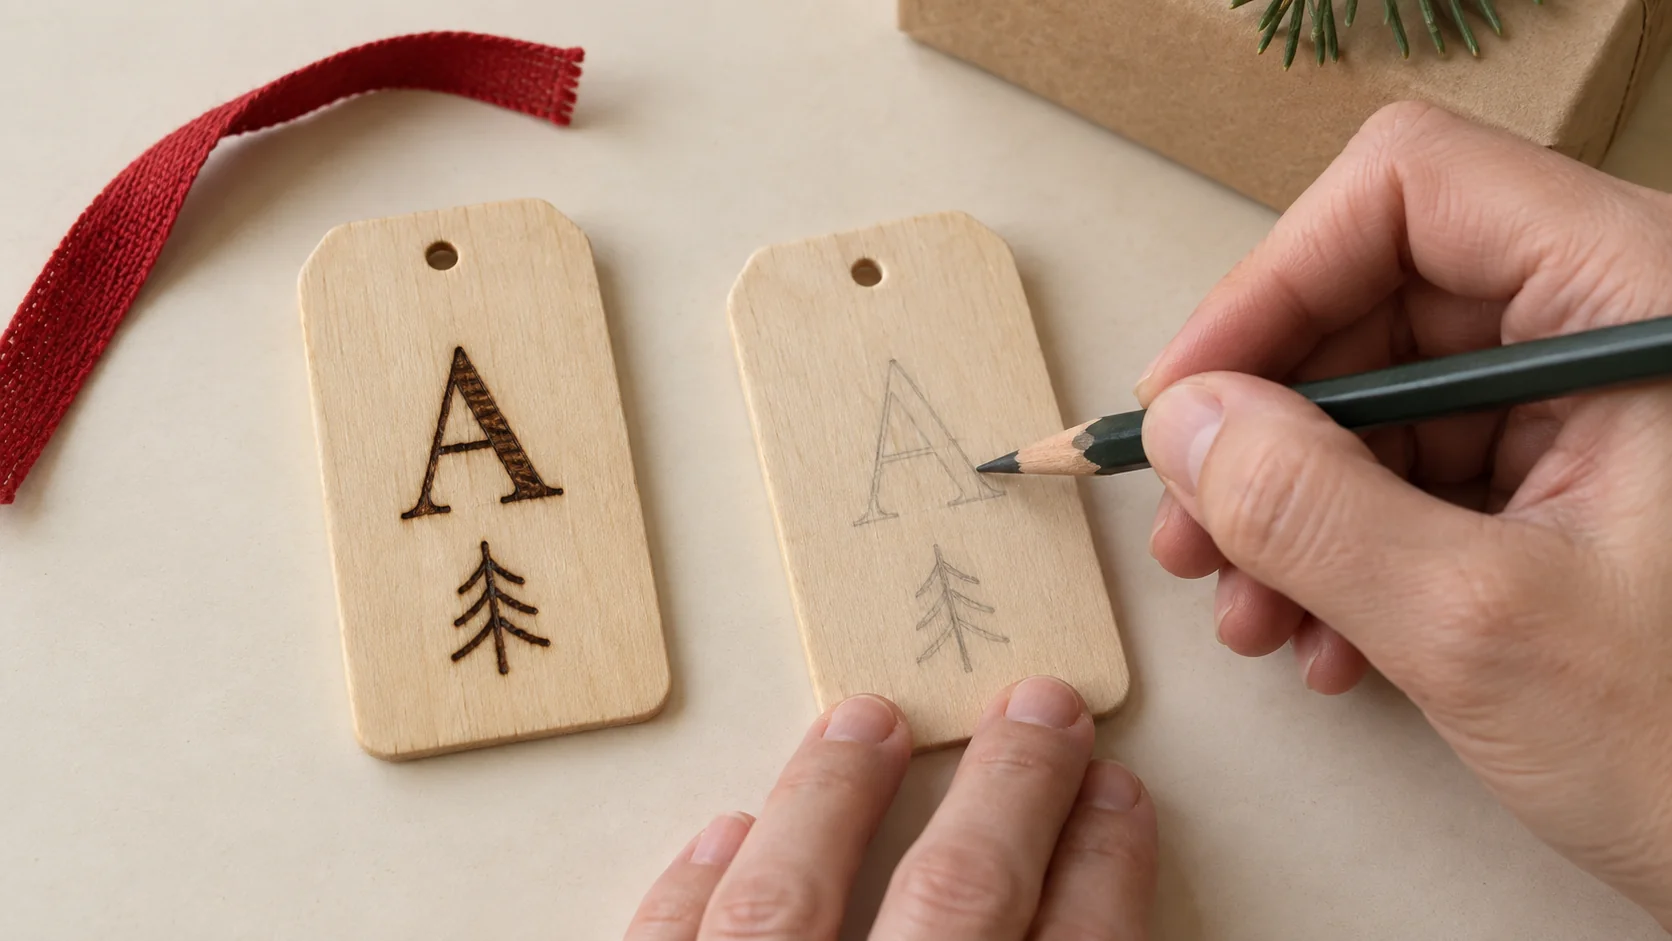
- Plan around the hole. Leave a margin so the ribbon will not cover the letter.
- Draw the design at actual size. Test it on paper first, especially for a narrow or irregular tag.
- Transfer a light outline. If using graphite paper, place its marking side against the wood. Lift a corner to check the transfer, then remove all paper and tape before burning.
- Burn the initial and one small motif. Simple outline letters need less filling than a solid dark design.
- Attach it after cooling and finishing. Thread ribbon through the hole when the piece is ready to handle and package.
A short first name can work on a larger tag, but check the spelling and spacing before heating the pen. For more lettering help, see the name-plaque project.
Burn a JOY plaque for an indoor display
Use the larger oval plaque for three outlined block letters and a short spruce sprig below. Draw around the blank on paper first so the curved ends do not squeeze the lettering.
- Center the word as a whole. Leave comfortable space around the J and Y, then check the gap between each letter.
- Trace the layout. Use a light pencil outline or transfer paper. Remove the template before switching on the burner.
- Outline one letter at a time. Keep the first pass light. Rest the pen in its holder to turn the plaque for curves and corners.
- Add the sprig last. A short stem with a few angled needles is enough. Stop while the sign still has clear space around the word.
Display the finished plaque securely indoors, away from candles, fireplaces and other heat sources. A decorative wooden sign belongs outside the hot area of a mantel, and its mounting must suit its weight. For a larger design, follow the welcome-sign guide.
Finish, dry and package before gifting
A decorative ornament does not automatically need Danish oil or a thick coating. Choose the finish for the look and intended use, test it on scrap, and follow its application, cleanup and curing directions.
- Finish all burning first. Do not return with a hot pen after adding paint, colored pencil, oil or a coating.
- Leave enough time. Preparation, cooling and any finish curing all count toward the project. A small design is not a guaranteed ten- or twenty-minute gift.
- Package only when ready. Follow the finish maker’s handling and curing instructions. Dry to the touch does not necessarily mean ready for wrapping.
- Include a simple care note. Describe it as an indoor decoration and keep wooden ornaments away from flames and heat.
The finishing guide explains the options. Store completed decorations dry, with protection between pieces so their surfaces do not rub together.
Make a small batch and let children help without heat
Complete one sample before preparing the rest. Check the size, lettering and hanging arrangement, then repeat the stages: prepare the blanks, draw the layouts, burn, cool and finish. Keep unneeded supplies away from the hot-tool area.
Children can choose motifs, draw paper patterns or decorate a separate paper tag with age-appropriate art supplies. The adult handles the burning in a separate work session. Heat-activated paint still needs heat; it is not the no-heat activity described here.
Use our no-heat project guide for children for that activity. If you want another small gift after the holiday set, try wood-burned coasters or browse more handmade gift ideas.