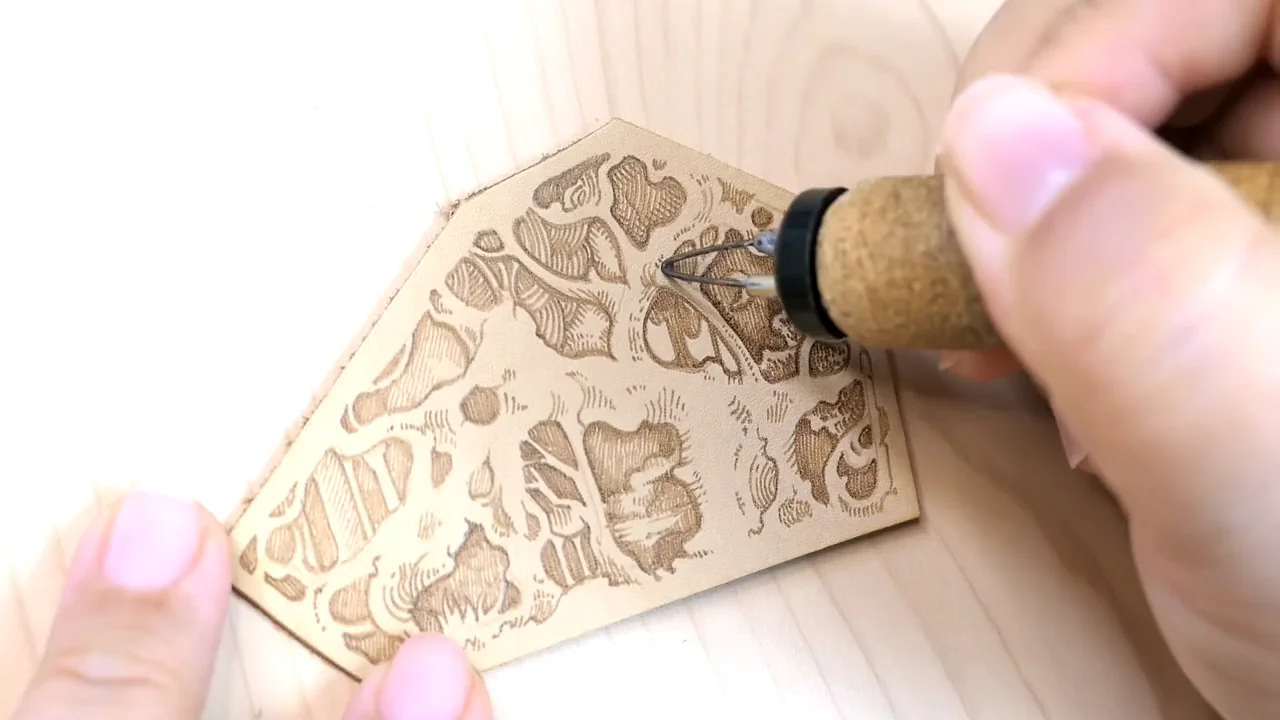
Leather pyrography uses a heated pen to draw permanent marks on leather. Start with a small, flat piece of natural, undyed vegetable-tanned leather and a simple outline. A scrap test helps you find a useful heat setting before you touch the design.
Choose the leather before the pattern
Use leather identified by the supplier as vegetable-tanned, undyed and unfinished. “Genuine leather” describes neither the tanning process nor the surface treatment. Colour alone cannot identify it.
Skip chrome-tanned leather, dyed or coated pieces, faux leather, bonded leather and unidentified scraps. An old wallet or jacket is not a suitable shortcut when its materials and finish are unknown.
This natural vegetable-tanned tooling leather is listed as undyed, 3–4 oz leather, approximately 1.2–1.6 mm thick. It is a starting material for small projects; select the natural version and keep an offcut from the same piece for practice. Leather “ounces” here describe thickness, not the total weight of the sheet.
Vegetable-tanned does not mean fume-free. Burning leather still produces emissions. Use appropriate ventilation and extraction, keep your face out of the plume, and stop if the setup cannot control the fumes. Our pyrography safety guide covers the workspace considerations.
Set up a small first project
A flat decorative patch is easier to practise on than an assembled wallet. Draw a rounded rectangle on paper, leave a clear border and add one leaf, initial or simple geometric motif. Plan any stitch holes outside the drawing.
- A dry piece of suitable leather and a matching practice offcut.
- A pyrography tool approved for leather, with controllable heat or a leather-specific setting.
- The tool’s stable holder and a firm, heat-resistant work surface.
- A paper pattern, light tracing tool and optional wax-free graphite transfer paper.
Work on the smooth grain side. Keep the leather flat and your supporting hand away from the hot tip. Fit or change attachments with the tool unplugged and cool, following its instructions. Do the burning before adding dyes, oils, adhesives or finishes.
Transfer a light outline
Saral wax-free graphite transfer paper is one option for tracing a printed pattern. First make a small test mark on your offcut and check that it removes cleanly without changing the surface.
- Position the paper pattern over the smooth side of the leather.
- Slip the transfer sheet beneath it, with its marking side facing the leather.
- Hold everything steady and trace only the lines you intend to burn, using light pressure.
- Lift one corner to check the result before removing the pattern.
Pressing hard can emboss a groove rather than leave a light guide. Avoid strong adhesive tape on the finished face; it can lift or mark the surface. If your chosen preparation method uses water, let the leather dry fully before burning.
Test the heat on the matching offcut
Do not copy a universal leather temperature or another artist’s dial number. Your tool, attachment and leather all affect the mark. Start at a low setting allowed by the tool’s instructions and make a short line with a light touch.
- Too pale: try a slightly slower pass. If necessary, increase the heat a little, allow the tool to respond and test again.
- Instant blackening or a spreading dark edge: lower the heat and check that the tip is not lingering.
- A groove, drag or torn surface: stop and reassess heat and pressure rather than forcing the tip along.
Test a curve and a few short strokes as well as a straight line. Keep the offcut beside you for checks whenever you change the nib or setting. The temperature guide explains how to change one variable at a time.
Burn the outline, then build detail
Start with one leaf, initial or simple shape. Keep the first pass light so you can check the outline before deepening the colour.
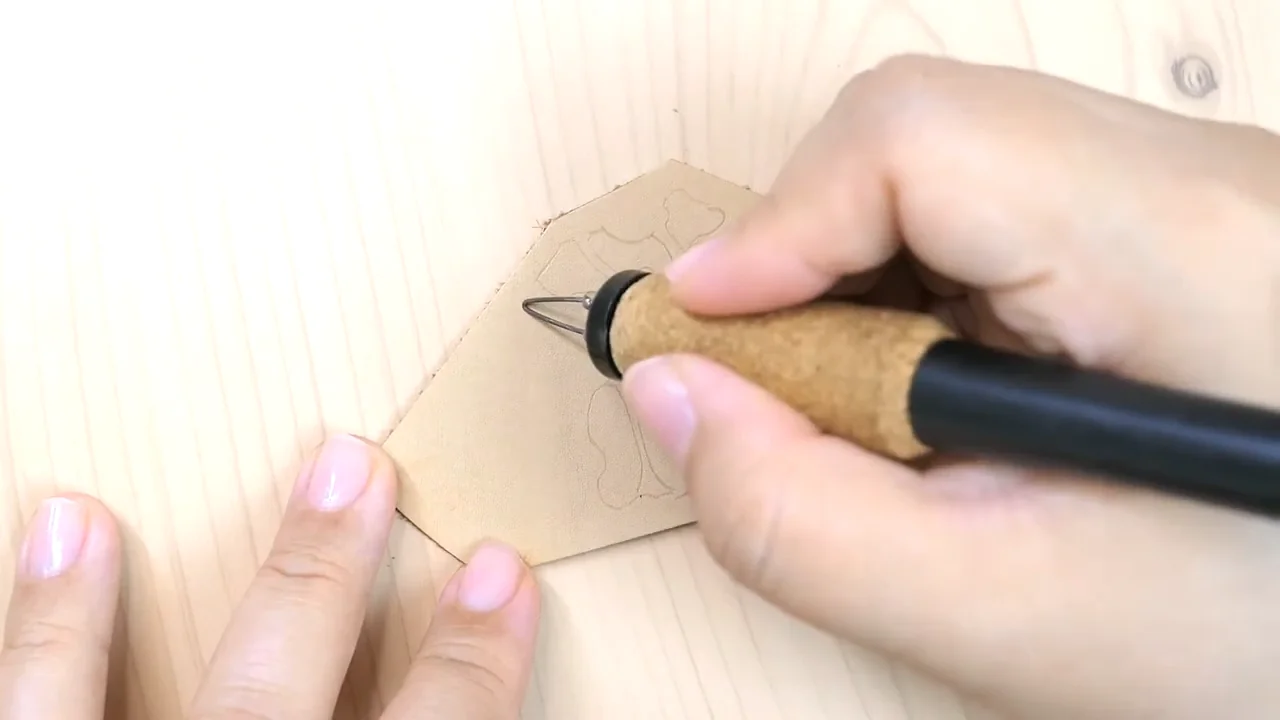
- Begin with a short, simple edge. Touch down gently and move along the guide. Lift the tip before pausing.
- Turn the work for awkward curves. Reposition with the pen safely in its holder instead of stretching your wrist across the design.
- Complete the main outline. Check its overall shape before adding texture or darker areas.
Add texture a little at a time
Use short, spaced strokes inside the outline. Leave some leather untouched to create contrast and keep the pattern readable. Work in small areas, letting each one cool before another pass.
Check the nib for buildup if it begins to drag. Clean it using the method approved for that tool; see our tip-care guide. Do not keep adding heat to compensate for a dirty nib.
Finish for the way the piece will be used
Let the leather cool and remove remaining transfer marks gently using the method you tested. Do not sand the artwork as though it were a wooden board: damaged surface fibres and deep burns can remain visible.
Choose a leather-specific finish suited to the project, then test it on the burned offcut. Check the colour, flexibility and whether any residue transfers after drying. A finish can darken the background and reduce the contrast of pale burns.
Leather wax finishes and conditioners have different purposes; neither category should be treated as automatically waterproof. Follow the product’s instructions and let it dry fully before stitching or handling. Never return a hot pen to a surface after applying a finish.
Choose the next project by function
| Project | Keep the design simple | Plan before burning |
|---|---|---|
| Decorative patch | One symbol or a bold outline. | Leave a margin for stitching and choose a suitable backing project. |
| Bookmark | A narrow border or single motif. | Choose leather thin enough for its purpose; test finish transfer before placing it between pages. |
| Key fob | An initial or small leaf. | Allow room for the fold and hardware, away from the burned design. |
| Journal panel | A corner decoration or repeated border. | Plan folds, seams and attachment points before drawing. |
There is no single minimum thickness for every leather project. Use a leatherworking pattern that specifies the material and construction, then fit your pyrography into its clear areas. Keep the first test piece as a reference for your next session.